
The Best Fudgy Red Velvet Brownies You Must Try Today!
Introduction to The Best Fudgy Red Velvet Brownies
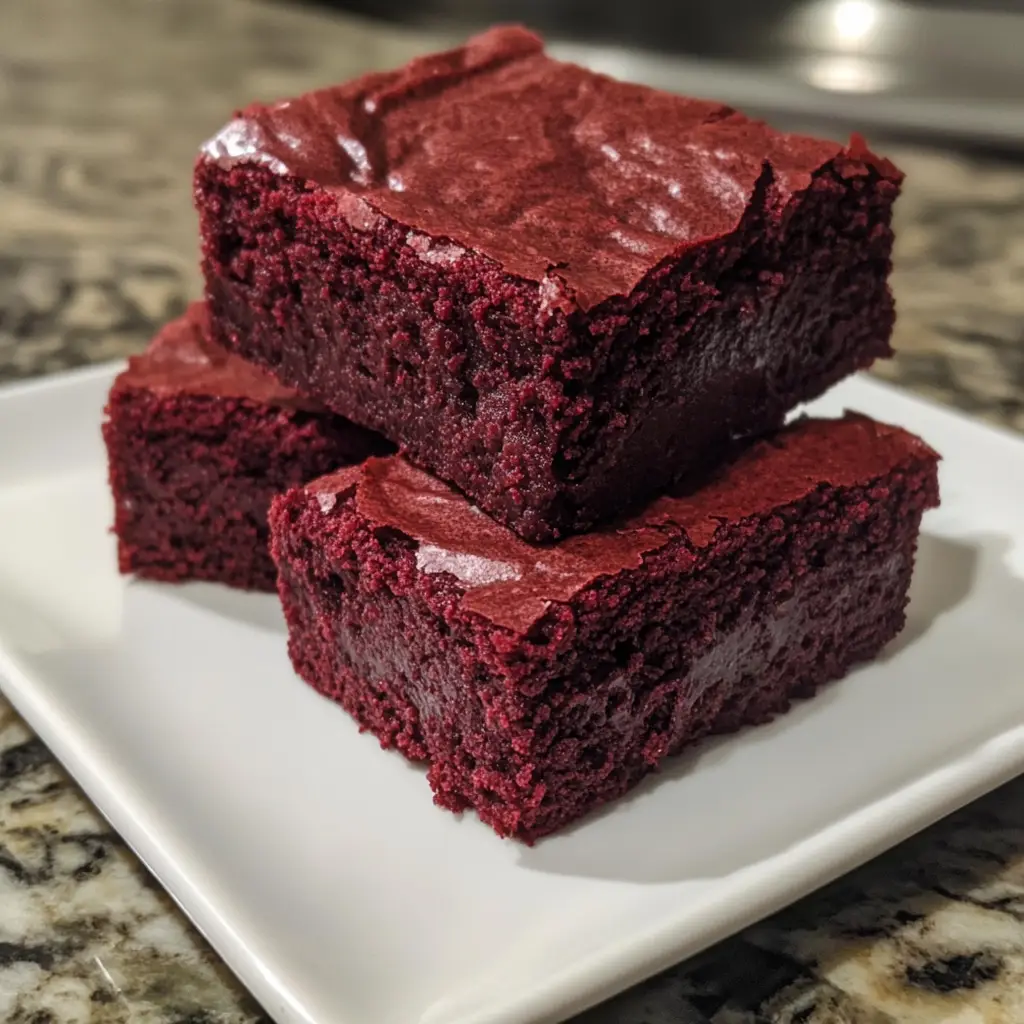
Welcome to a world of indulgence with The Best Fudgy Red Velvet Brownies! If you’re like me, juggling a busy life while trying to whip up something special can feel overwhelming. But fear not! These brownies are not just a treat; they’re a quick solution for those hectic days when you want to impress your loved ones without spending hours in the kitchen. Rich, decadent, and oh-so-fudgy, they’ll have everyone asking for seconds. Trust me, once you try these, they’ll become your go-to dessert for any occasion!
Why You’ll Love This The Best Fudgy Red Velvet Brownies
These brownies are a dream come true for busy moms and professionals alike. They come together in just 45 minutes, making them perfect for last-minute gatherings or a sweet treat after dinner. The rich chocolate flavor combined with that signature red velvet hue creates a dessert that’s not only delicious but visually stunning. Plus, who can resist a fudgy brownie? They’re sure to bring smiles to your family’s faces!
Ingredients for The Best Fudgy Red Velvet Brownies
Gathering the right ingredients is the first step to creating The Best Fudgy Red Velvet Brownies. Here’s what you’ll need:
- Unsalted butter: This adds richness and moisture, making your brownies fudgy.
- Granulated sugar: Sweetens the brownies and helps achieve that perfect texture.
- Large eggs: They bind the ingredients together and provide structure.
- Vanilla extract: A splash of this adds depth and enhances the overall flavor.
- All-purpose flour: The base of your brownies, giving them that classic chewy texture.
- Unsweetened cocoa powder: This is what gives your brownies their rich chocolate flavor.
- Baking powder: A leavening agent that helps the brownies rise slightly.
- Salt: Just a pinch enhances the sweetness and balances the flavors.
- Red food coloring: This is what transforms your brownies into a stunning red velvet treat.
- Chocolate chips: These add extra chocolatey goodness and a delightful texture.
For those looking to switch things up, consider using dark chocolate chips for a richer flavor or gluten-free flour for a gluten-free version. You can find all the exact measurements at the bottom of the article, ready for printing!
How to Make The Best Fudgy Red Velvet Brownies
Step 1: Preheat and Prepare
First things first, let’s get that oven preheating to 350°F (175°C). This is crucial for achieving that perfect fudgy texture. While the oven warms up, grab a 9×13 inch baking pan and grease it well. You can use butter or cooking spray—whatever you have on hand. This step ensures your brownies won’t stick, making it easier to cut them into those delightful squares later on.
Step 2: Mix the Wet Ingredients
Now, let’s melt the unsalted butter in a large bowl. You can do this in the microwave or on the stovetop—just be careful not to let it bubble. Once melted, stir in the granulated sugar until it’s well combined. Next, add the eggs one at a time, mixing thoroughly after each addition. This helps create a smooth batter. Finally, stir in the vanilla extract, which adds a lovely aroma and flavor to your brownies. Trust me, this step is where the magic begins!
Step 3: Combine the Dry Ingredients
In a separate bowl, whisk together the all-purpose flour, unsweetened cocoa powder, baking powder, and salt. This is an important step to ensure even distribution of the dry ingredients. Whisking helps to aerate the mixture, making your brownies light yet fudgy. Plus, it’s a great way to get your kids involved—let them take a turn with the whisk! Once combined, set this bowl aside for the next step.
Step 4: Combine Wet and Dry Mixtures
Now it’s time to bring the wet and dry ingredients together. Gradually add the dry mixture to the wet ingredients, stirring gently until just combined. Be careful not to overmix; we want to keep that fudgy texture intact. It’s okay if there are a few lumps—this is what makes your brownies rich and delicious. Just remember, less is more when it comes to mixing!
Step 5: Add Color and Chocolate
Here comes the fun part! Stir in the red food coloring until the batter is a vibrant red. This is what transforms your brownies into a stunning red velvet treat. Then, fold in the chocolate chips, ensuring they’re evenly distributed throughout the batter. The chocolate chips will melt slightly during baking, creating pockets of gooey goodness. Who can resist that?
Step 6: Bake the Brownies
Pour the luscious batter into your prepared baking pan, spreading it evenly with a spatula. Pop it into the preheated oven and bake for 25-30 minutes. Keep an eye on them! You want a toothpick inserted in the center to come out with a few moist crumbs, not completely clean. This is the secret to achieving that fudgy texture we all crave!
Step 7: Cool and Serve
Once baked, remove the brownies from the oven and let them cool in the pan for about 10-15 minutes. This cooling time helps them set up nicely. After that, transfer them to a wire rack to cool completely. Once cooled, cut them into squares and serve. You can enjoy them as they are or add a scoop of vanilla ice cream for an extra indulgent treat!
Tips for Success
- Don’t overbake! Check your brownies a few minutes early for that perfect fudgy texture.
- Use room temperature eggs for better mixing and a smoother batter.
- For extra flavor, try adding a pinch of espresso powder to enhance the chocolate.
- Let the brownies cool completely before cutting for cleaner edges.
- Store leftovers in an airtight container to keep them fresh and fudgy.
Equipment Needed
- 9×13 inch baking pan: A standard size for brownies; you can use a glass or metal pan.
- Mixing bowls: Use any size you have; a large bowl for wet ingredients and a medium for dry.
- Whisk: A hand whisk works great, but a fork can do the job too.
- Spatula: Essential for spreading the batter evenly; a silicone spatula is ideal.
- Measuring cups and spoons: For accurate ingredient measurements; you can use a kitchen scale if preferred.
Variations of The Best Fudgy Red Velvet Brownies
- Nutty Delight: Add chopped walnuts or pecans for a crunchy texture that complements the fudginess.
- Cheesecake Swirl: Create a marbled effect by swirling in a cream cheese mixture before baking.
- Mint Chocolate: Incorporate mint extract and chocolate chips for a refreshing twist on the classic flavor.
- Gluten-Free Option: Substitute all-purpose flour with a gluten-free blend for a delicious gluten-free treat.
- Vegan Version: Replace eggs with flaxseed meal and use plant-based butter for a vegan-friendly brownie.
Serving Suggestions for The Best Fudgy Red Velvet Brownies
- Pair with a scoop of vanilla ice cream for a delightful contrast in temperature and texture.
- Serve with fresh berries for a pop of color and a hint of tartness.
- Drizzle with chocolate or cream cheese frosting for an extra indulgent touch.
- Enjoy with a cup of coffee or a glass of milk to balance the sweetness.
FAQs about The Best Fudgy Red Velvet Brownies
Can I make these brownies ahead of time?
Absolutely! You can prepare The Best Fudgy Red Velvet Brownies a day in advance. Just store them in an airtight container at room temperature. They’ll stay deliciously fudgy and ready to impress your guests!
What can I use instead of red food coloring?
If you prefer a natural alternative, you can use beet juice or powdered beetroot. It will give your brownies a lovely red hue without artificial coloring. Just keep in mind that the shade may vary slightly.
How do I know when the brownies are done baking?
The key to perfect brownies is checking for doneness. Insert a toothpick into the center; it should come out with a few moist crumbs. If it’s completely clean, they might be overbaked!
Can I freeze the brownies?
Yes! These brownies freeze beautifully. Just wrap them tightly in plastic wrap and place them in a freezer-safe container. They can last up to three months. Thaw them at room temperature before serving.
What’s the best way to store leftovers?
To keep your brownies fresh, store them in an airtight container at room temperature. They’ll stay fudgy for up to a week. If you want to keep them longer, consider freezing them!
Final Thoughts
Making The Best Fudgy Red Velvet Brownies is more than just baking; it’s about creating moments of joy and connection. The rich, velvety texture and vibrant color bring a smile to my family’s faces, turning an ordinary day into something special. Whether it’s a cozy night in or a gathering with friends, these brownies are the perfect sweet treat. I hope you find as much joy in making and sharing them as I do. So, roll up your sleeves, embrace the mess, and let the delicious aroma fill your kitchen. Happy baking!
PrintThe Best Fudgy Red Velvet Brownies You Must Try Today!
These fudgy red velvet brownies are a rich and decadent treat, perfect for any occasion.
- Prep Time: 15 minutes
- Cook Time: 30 minutes
- Total Time: 45 minutes
- Yield: 24 brownies 1x
- Category: Dessert
- Method: Baking
- Cuisine: American
- Diet: Vegetarian
Ingredients
- 1 cup unsalted butter
- 2 cups granulated sugar
- 4 large eggs
- 1 tablespoon vanilla extract
- 1 cup all-purpose flour
- 1/2 cup unsweetened cocoa powder
- 1 teaspoon baking powder
- 1/2 teaspoon salt
- 1 tablespoon red food coloring
- 1 cup chocolate chips
Instructions
- Preheat your oven to 350°F (175°C) and grease a 9×13 inch baking pan.
- In a large bowl, melt the butter and mix in the sugar until well combined.
- Add the eggs one at a time, mixing well after each addition, then stir in the vanilla extract.
- In another bowl, whisk together the flour, cocoa powder, baking powder, and salt.
- Gradually add the dry ingredients to the wet ingredients, mixing until just combined.
- Stir in the red food coloring and chocolate chips until evenly distributed.
- Pour the batter into the prepared baking pan and spread it evenly.
- Bake for 25-30 minutes, or until a toothpick inserted in the center comes out with a few moist crumbs.
- Let the brownies cool in the pan before cutting into squares and serving.
Notes
- For extra fudginess, do not overbake the brownies.
- These brownies can be stored in an airtight container for up to a week.
- Serve with a scoop of vanilla ice cream for an indulgent dessert.
Nutrition
- Serving Size: 1 brownie
- Calories: 250
- Sugar: 20g
- Sodium: 150mg
- Fat: 12g
- Saturated Fat: 7g
- Unsaturated Fat: 3g
- Trans Fat: 0g
- Carbohydrates: 35g
- Fiber: 2g
- Protein: 3g
- Cholesterol: 70mg
Keywords: Fudgy Red Velvet Brownies, Brownies Recipe, Red Velvet Dessert