
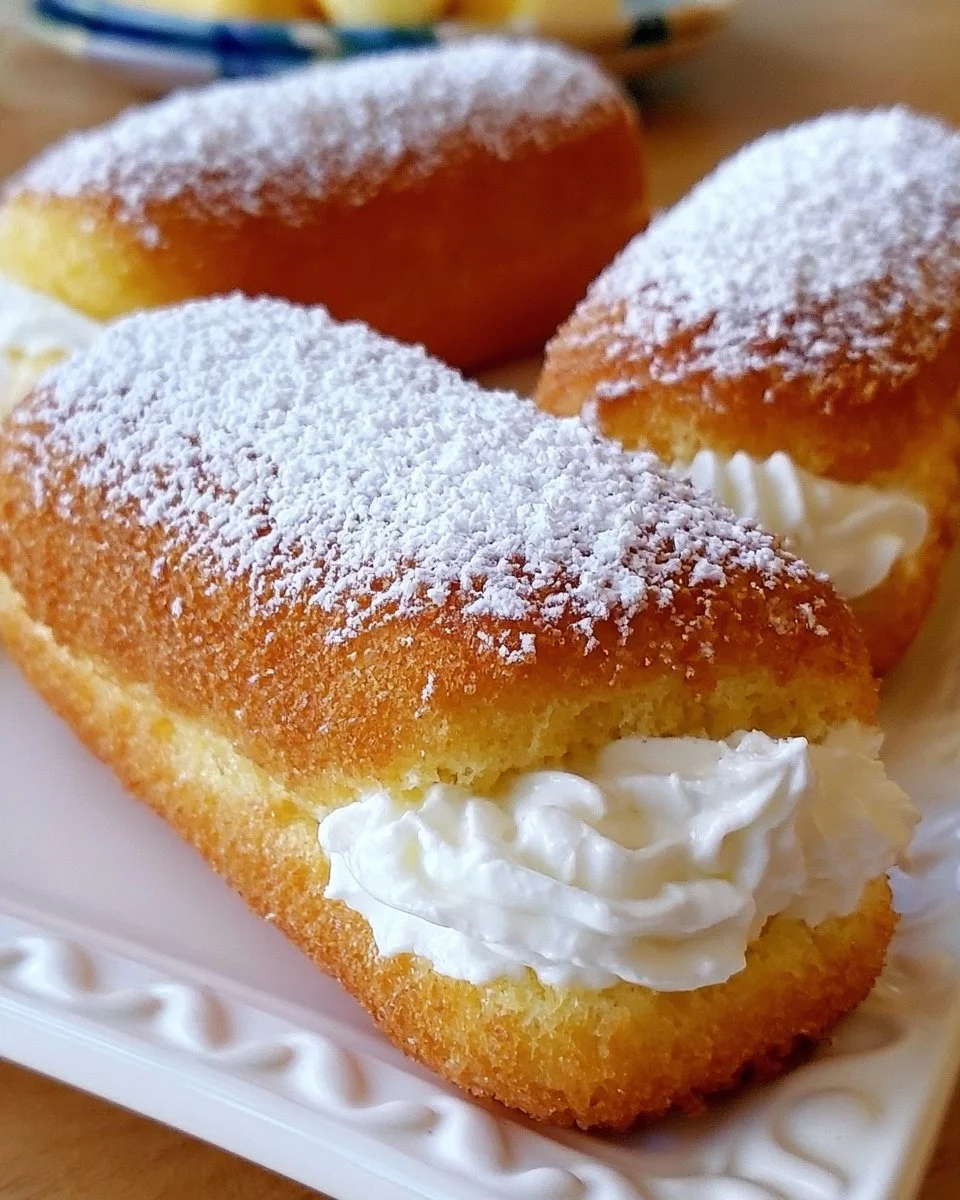
Homemade Twinkies
The first bite of a homemade Twinkie takes you back to carefree childhood days—moments filled with laughter, bright sunshine, and the delightful sweetness of life. As you sink your teeth into its soft sponge, you experience the delicate balance of just-lightly sweet vanilla flavor contrasting with the creamy filling that generously nestles inside. The cake exterior, golden and slightly crisp around the edges, gives way to pillowy softness, enveloping that delicious cream like a warm embrace. Each mouthful bursts with nostalgia, and those flavors linger, inviting you to savor another.
Imagine the enchanting aroma wafting through your kitchen as you mix up the batter; it brings an undeniable joy that fills your heart and home. The Visual transformation is equally compelling: fluffy, soft golden logs emerge from the oven, their inviting shape ready to be filled. This is not just a dessert; this is a little moment of heaven, drizzled with love and sprinkled with happiness. Each creation shouts, “Enjoy me!” and you cannot help but oblige.
Why You’ll Love This Homemade Twinkies Recipe
This homemade Twinkies recipe transcends mere indulgence; it stands as a nostalgic tribute to simpler times while offering incredible flavor and texture you simply cannot find in packaged versions. Each bite delivers a playful play of senses; the soft sponge, the rich, creamy filling, and the sweet aroma remind you of lazy afternoons spent racing the school bell, savoring each crumb. Think about birthday parties, picnics, or just a cozy evening spent enjoying dessert; Twinkies elevate these moments, adding a delightful touch of whimsy and sweetness.
Furthermore, the satisfaction of crafting these treats yourself is unmatched. You control the quality of ingredients, choosing organic flour and the freshest eggs. Plus, think of all the fun you can have customizing your filling—maybe a hint of chocolate, or perhaps a splash of lemon zest? These homemade delights turn ordinary occasions into extraordinary memories, allowing you to create your version of this nostalgic treat while filling your home with laughter and joy.
Preparation Phase & Tools to Use
Creating your homemade Twinkies requires only a few essential tools, each crucial for achieving that authentic taste and texture:
- Twinkie Pan: A specialized pan makes all the difference here, ensuring your cakes have that iconic shape. Look for non-stick options for easy release.
- Mixing Bowls: Having both large and medium mixing bowls aids in a smooth workflow. You’ll mix dry ingredients in one and cream the butter and sugar in another.
- Electric Mixer: An electric mixer, whether handheld or stand, will save you time and effort when creaming the butter and sugar to peak fluffiness.
- Piping Bag: Fill your Twinkies with ease using a piping bag. A plain round tip works best to get that filling just right without any mess.
Preparation Tip: Gather all your ingredients before you start. It makes the entire process smoother and more enjoyable, keeping potential spills and distractions at bay.
Ingredients for Homemade Twinkies
To craft these delightful treats, you’ll need the following ingredients:
- 1 cup all-purpose flour: For that essential structure, giving the cakes a soft yet sturdy foundation.
- 1 teaspoon baking powder: This leavening agent creates the lightness you crave in every bite.
- 1/4 teaspoon baking soda: A further boost to ensure your cakes rise beautifully.
- 1/4 teaspoon salt: Salt amplifies flavors, enhancing the sweetness.
- 1/4 cup unsalted butter, softened: Provides rich flavor; ensure it’s softened for easy creaming.
- 1/2 cup granulated sugar: Sweetness is key; you can experiment with alternatives like coconut or cane sugar.
- 2 large eggs: Eggs help bind the cake, adding moisture and richness.
- 1 teaspoon vanilla extract: Pure vanilla extract has a depth of flavor that’s irreplaceable.
- 1/2 cup milk: This keeps the batter moist and tender.
- 1 cup powdered sugar: Essential for that luscious creamy filling.
- 1/4 cup shortening: This helps achieve a stable, creamy filling. Look for non-hydrogenated options for a healthier twist.
- 1 teaspoon vanilla extract (for filling): Vanilla in the filling further enhances flavor.
- 1 tablespoon milk (for filling): Adjusts the texture of the filling, achieving just the right creaminess.
Consider substitutions like almond extract for a twist or use gluten-free flour if needed, allowing everyone to indulge!
How to Make Homemade Twinkies
- Preheat your oven to 350°F (175°C) and prepare your Twinkie pan by greasing it well.
- In a large bowl, whisk together the flour, baking powder, baking soda, and salt until well combined.
- In another bowl, use an electric mixer to cream the softened butter and granulated sugar until the mixture appears light and fluffy—a crucial step for adding air to the batter.
- Beat in the eggs one at a time, mixing well after each addition. Then mix in the vanilla extract, infusing the batter with flavor.
- Gradually add the dry flour mixture, alternating with the milk, and mix just until smooth; avoid overmixing to keep your cakes tender.
- Pour the batter into the prepared Twinkie pan, filling each cavity about three-quarters full to allow for rising.
- Bake for 15-20 minutes, or until the tops are golden brown and a toothpick inserted into the center comes out clean.
- As the cakes cool, prepare the filling by mixing together the powdered sugar, shortening, vanilla, and milk until you achieve a smooth, creamy texture.
- Once the cakes have cooled completely, fill a piping bag with your creamy mixture and carefully inject the filling into each Twinkie.
- Enjoy your homemade Twinkies with family and friends, or savor them all by yourself!
Pro Tip: Allow the cakes to cool completely before filling them; this ensures the filling won’t melt and slide out.
Chef’s Notes & Helpful Tips
- Make-Ahead Tips: You can prepare the cakes a day in advance. Store in an airtight container to keep them fresh, then fill them right before serving for optimal creaminess.
- Cooking Alternatives: If you want to experiment, you can make these in an air fryer—just adjust the time and temperature slightly for even results!
- Customization Ideas: Go wild with your fillings! Consider chocolate, raspberry, or even a hint of mint for unexpected twists. For added fun, dip them in melted chocolate for a decadent finish.
Common Mistakes to Avoid
Creating your perfect Twinkie involves attention to detail. Here are some pitfalls to avoid:
- Overmixing the Batter: Overmixing can lead to dense, rubbery cakes. Mix until just combined for that light, airy texture.
- Not Greasing the Pan Properly: Unsightly sticking can occur if you neglect this step. Ensure the pan is well-greased; alternatively, use parchment paper for extra insurance.
- Skipping the Cooling Step: Filling your cakes while they are warm can cause the filling to ooze out. Wait until they are completely cool for the best results.
- Incorrect Oven Temperature: Always check your oven’s calibration. An oven that is too hot can burn the edges while leaving the center doughy.
By understanding these common mistakes, you’ll set yourself up for Twinkie success!
What to Serve With Homemade Twinkies
Pair your homemade Twinkies with delightful accompaniments for a complete experience:
- Whipped Cream: A dollop of fresh whipped cream adds an airy texture to your dessert, enhancing its delightful creaminess.
- Fresh Berries: Strawberries, blueberries, or raspberries bring a refreshing contrast, cutting through the sweetness perfectly.
- Hot Chocolate or Coffee: These warm beverages create a comforting pairing, enveloping each bite in love and warmth.
- Ice Cream: Vanilla bean or chocolate ice cream complements the softness of the Twinkies, elevating the treat to another level of indulgence.
- Chocolate Sauce: Drizzle some rich chocolate sauce over your Twinkies for an extra-sweet experience that chocolate lovers will adore.
- Caramel Sauce: A light drizzle of caramel gives a rich, buttery sweetness, providing an exciting twist.
- Milk: A glass of cold milk never goes amiss; it adds a classic touch and a soothing balance to the sweetness.
Storage & Reheating Instructions
To keep your Twinkies fresh:
- Refrigerator: Store them in an airtight container in the fridge for up to five days. The cooler environment helps maintain their texture.
- Freezer: For longer storage, wrap each Twinkie tightly in plastic wrap and place them in a freezer-safe container. They can last up to three months in the freezer.
- Reheating: Allow frozen Twinkies to thaw in the fridge overnight before enjoying. You can also microwave them for a few seconds if you prefer that comforting warmth.
Estimated Nutrition Information
Per Twinkie (approximate values; varies based on specific ingredients):
- Calories: 150
- Total Fat: 7g
- Saturated Fat: 2g
- Cholesterol: 40mg
- Sodium: 120mg
- Total Carbohydrates: 24g
- Sugars: 12g
- Protein: 2g
These values are estimates and can vary based on ingredient choices and portion sizes.
FAQs
1. Can I use gluten-free flour in this recipe?
Absolutely! Substitute equal amounts of gluten-free all-purpose flour for a delightful gluten-free version. Look for a blend that includes a binding agent like xanthan gum for the best texture.
2. How do I get the filling to stay in the Twinkie?
Filling them properly is key. Use a piping bag with a small tip to inject the filling, and fill until you feel a little resistance as it fills the cavity. This ensures a perfect ratio of cake to filling!
3. Can these Twinkies be made vegan?
Yes! You can replace the eggs with a chia seed or flaxseed egg (1 tablespoon of chia or flaxseed mixed with 3 tablespoons water) and use a plant-based butter, alternative milk, and shortening for a delicious vegan treat.
4. How do I make the filling thicker or thinner?
For a thicker filling, add more powdered sugar, and for a thinner consistency, incorporate a little more milk until you reach your desired texture.
5. Can I customize the flavors of the filling?
Certainly! Experiment with flavors like chocolate by using cocoa powder, or add a hint of citrus zest for a fresh twist. The filling is your canvas, go wild!
Conclusion
Crafting these homemade Twinkies is not just about creating delightful treats; it’s about reliving memories, indulging in flavors, and sharing joy with loved ones. Each bite whispers sweet nostalgia, a comforting reminder of the simple pleasures in life. So gather your ingredients, channel your inner pastry chef, and dive into the deliciousness of homemade Twinkies. This is your chance to create something marvelous, something delicious that will leave everyone asking for more. Embrace the experience and enjoy every scrumptious moment!
PrintHomemade Twinkies
Relive childhood nostalgia with these delightful homemade Twinkies, featuring a soft sponge cake filled with rich cream.
- Prep Time: 20 minutes
- Cook Time: 20 minutes
- Total Time: 40 minutes
- Yield: 12 servings 1x
- Category: Dessert
- Method: Baking
- Cuisine: American
- Diet: Vegetarian
Ingredients
- 1 cup all-purpose flour
- 1 teaspoon baking powder
- 1/4 teaspoon baking soda
- 1/4 teaspoon salt
- 1/4 cup unsalted butter, softened
- 1/2 cup granulated sugar
- 2 large eggs
- 1 teaspoon vanilla extract
- 1/2 cup milk
- 1 cup powdered sugar
- 1/4 cup shortening
- 1 teaspoon vanilla extract (for filling)
- 1 tablespoon milk (for filling)
Instructions
- Preheat your oven to 350°F (175°C) and prepare your Twinkie pan by greasing it well.
- Whisk together the flour, baking powder, baking soda, and salt until well combined.
- Cream the softened butter and granulated sugar until light and fluffy.
- Beat in the eggs one at a time, mixing well after each addition, then mix in the vanilla extract.
- Gradually add the dry flour mixture, alternating with the milk, mixing just until smooth.
- Pour the batter into the prepared Twinkie pan, filling each cavity about three-quarters full.
- Bake for 15-20 minutes, or until golden brown and a toothpick comes out clean.
- Prepare the filling by mixing the powdered sugar, shortening, vanilla, and milk until smooth.
- Fill a piping bag with the creamy mixture and inject it into each cooled Twinkie.
- Enjoy your homemade Twinkies!
Notes
Make-ahead tips: Prepare the cakes a day in advance. Customize your filling with various flavors like chocolate or fruit.
Nutrition
- Serving Size: 1 Twinkie
- Calories: 150
- Sugar: 12g
- Sodium: 120mg
- Fat: 7g
- Saturated Fat: 2g
- Unsaturated Fat: 4g
- Trans Fat: 0g
- Carbohydrates: 24g
- Fiber: 0g
- Protein: 2g
- Cholesterol: 40mg
Keywords: Twinkies, homemade dessert, nostalgic recipe, sponge cake, cream filling