
Easy Lemon Condensed Milk Pie
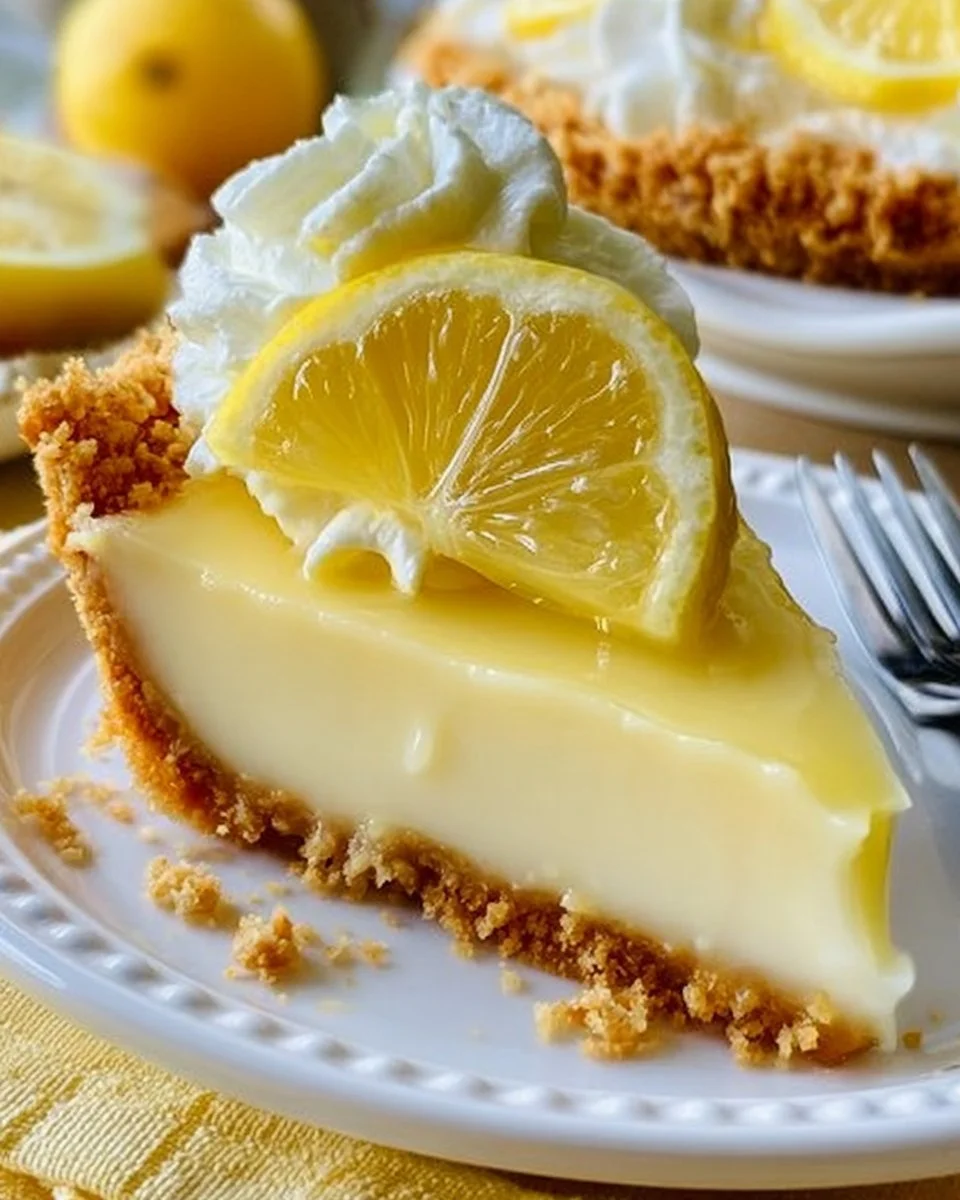
Sometimes, a dessert arrives like a gentle breeze on a warm summer day, effortlessly whisking us away to a place of culinary bliss. Imagine sitting on a sun-drenched patio, savoring the sweet-tart notes of fresh lemon as they blend with the velvety richness of condensed milk. Each bite reveals a delicate balance of flavors, a scene enriched by the fragrant aroma of zesty citrus and the comforting crunch of a graham cracker crust. As the creamy filling melts in your mouth, you find yourself surrendering to the joy of a well-crafted pie that embodies the essence of simplicity and elegance. This is the magic of the Easy Lemon Condensed Milk Pie.
This pie serves not just as a treat but as a beacon of nostalgia, ushering you back to cherished summer gatherings and family get-togethers. It’s a dessert that whispers promises of sunshine, laughter, and vibrant conversations. Topped with a cloud of whipped cream, each piece is a little celebration, a moment carved out just for you. Whether you share it with loved ones or relish it in solitude, this pie becomes an experience—one that lingers on the palate and in the heart long after the last forkful.
Why You’ll Love This Easy Lemon Condensed Milk Pie
The Easy Lemon Condensed Milk Pie captivates the taste buds with its harmonious blend of sweetness and tartness, making it a standout choice for any occasion. The star of the show, vibrant lemon juice, adds that perfect zing, invigorating the senses and brightening your day. Combined with the lusciousness of sweetened condensed milk, the filling boasts a silky texture that dances on the tongue, begging to be savored slowly.
This pie shines during warm-weather gatherings, birthday celebrations, or even quiet afternoons when you need a little indulgence. Its simplicity invites everyone to join in—whether baking novices or seasoned kitchen warriors. With minimal ingredients and effortless instructions, you’ll impress friends and family without spending hours in the kitchen.
Preparation Phase & Tools to Use
To bring this delightful pie to life, certain tools transform your cooking experience into a seamless journey.
- Mixing Bowl: Choose a medium-sized bowl to mix your ingredients. The right bowl allows you to combine the lemon juice and sweetened condensed milk thoroughly, ensuring a perfect blend of flavors.
- Whisk or Spoon: A whisk usually works best for achieving a smooth filling. It incorporates air, giving the pie a light texture.
- 9-inch Pie Plate: Opt for a glass or ceramic pie plate to showcase the beauty of your creation. You’ll want a sturdy vessel that’s easy to handle.
- Refrigerator: This essential appliance does the heavy lifting when it comes to setting your pie. Make sure you have enough space for it to chill properly.
Preparation Tips
- Use fresh lemons for juice—the vibrant flavor far surpasses that of bottled varieties, enhancing the pie’s overall taste.
- Ensure your crust is baked and cooled before adding the filling. A warm crust can lead to a soggy base.
Ingredients for Easy Lemon Condensed Milk Pie
- 1 cup fresh lemon juice: The brightness of freshly squeezed lemon juice lifts the entire pie, making it refreshingly tart.
- 1 can (14 oz) sweetened condensed milk: This is your secret weapon. Its creamy sweetness balances the tartness beautifully, creating a luscious filling.
- 1 graham cracker crust: A buttery, crunchy crust provides the ideal contrast to the smooth filling. You can make your own or buy it pre-made for convenience.
- Optional: whipped cream for topping: This fluffy addition adds an extra layer of creaminess and looks stunning on the finished pie.
Feel free to substitute key ingredients where necessary: use non-dairy condensed milk for a dairy-free version, or swap the graham crust for a cookie crust made from vanilla wafers for a fun twist.
How to Make Easy Lemon Condensed Milk Pie
- Mix the Filling: In your mixing bowl, combine the fresh lemon juice and sweetened condensed milk. Use a whisk to blend until smooth and uniform, ensuring no lumps remain.
- Pour into Crust: Carefully pour the luscious filling into your prepared graham cracker crust, spreading it evenly for a beautifully presented pie.
- Chill: Cover the pie with plastic wrap and place it in the refrigerator. Let it chill for at least 2 hours or until set; a good chill is key for achieving that delightful texture.
- Serve: Once set, slice the pie into wedges and serve chilled. If you like, add a dollop of whipped cream on top for an elegant finish.
Tips within Steps
- To maximize flavor, consider zesting a lemon to sprinkle on top before serving for an extra citrusy punch.
- Be patient as your pie sets; a perfectly chilled pie ensures a clean slice when serving.
Chef’s Notes & Helpful Tips
- Make-Ahead Tip: This pie is perfect for preparing a day in advance. It keeps beautifully in the fridge, allowing the flavors to meld even further.
- Cooking Alternatives: If you prefer a more baked flavor, you can bake the filling for 15 minutes at 350°F before chilling.
- Customization Ideas: Add crushed berries or a layer of fresh fruit beneath the whipped cream for a burst of color and flavor. Alternatively, infuse the filling with a hint of vanilla or almond extract for a nuanced taste.
Common Mistakes to Avoid
- Not Using Fresh Lemon Juice: Bottled lemon juice lacks the brightness needed for this recipe, so be sure to use fresh.
- Skipping the Chill Time: Without proper chilling, the filling may not set correctly, leading to a runny pie. Patience is your ally here!
- Overmixing the Filling: While you want a smooth mixture, overmixing can introduce unnecessary air, affecting the pie’s texture.
What to Serve With Easy Lemon Condensed Milk Pie
Enhance your dessert experience by pairing this luscious pie with delightful accompaniments. Consider these pairings:
- Fresh Berries: Raspberries or blueberries add a natural sweetness and a pop of color that complements the pie beautifully.
- Mint Leaves: A few fresh mint leaves provide a refreshing contrast to the rich filling.
- Ice Cream: A scoop of vanilla or lemon sorbet offers a creamy, cool balance that enriches every forkful.
- Iced Tea: A chilled glass of sweetened iced tea makes an excellent companion, enhancing the pie’s flavors without overpowering them.
- Coffee: The robust flavors of a freshly brewed cup of coffee contrast the pie’s sweetness, creating a perfect dessert pairing.
- Fruit Salsa: A light, zesty salsa made with diced fruits brings a vibrant twist that invigorates the palate.
- Coconut Whipped Cream: An alternative take on whipped cream that adds a tropical flair to the pie.
Storage & Reheating Instructions
Store any leftover pie in the refrigerator, loosely covered with plastic wrap, for up to 3-4 days. This delightful dessert does not freeze well, as the texture may alter upon thawing. If you plan to serve it later, can keep it chill for the freshest flavor.
Estimated Nutrition Information
Per slice (1/8 of pie):
- Calories: Approximately 230
- Total Fat: 9g
- Saturated Fat: 5g
- Cholesterol: 20mg
- Sodium: 150mg
- Total Carbohydrates: 36g
- Sugars: 27g
- Protein: 2g
Note: Nutritional content may vary based on specific ingredient brands and quantities.
FAQs
Can I use different types of citrus juice?
Absolutely! While lemon juice offers that classic tang, experimenting with lime, grapefruit, or orange can yield intriguing variations, each bringing its unique zing.
How thick should the filling be before serving?
The filling should be firm yet creamy. After chilling, the texture will resemble a soft custard. If it feels too runny, consider chilling it longer.
Can I use a store-bought crust?
Yes! A pre-made graham cracker crust saves time and effort, perfect for those who want a quick dessert without sacrificing flavor.
What if I want a gluten-free version?
You can find gluten-free graham cracker crusts at many grocery stores, or make your own using gluten-free cookies. Just check the label for safety.
How do I prevent the crust from getting soggy?
Blind baking the crust before adding the filling helps create a barrier, preventing moisture from making it soggy. Simply bake the crust for 10 minutes at 350°F before adding the lemon filling.
Conclusion
In a world brimming with complex desserts, the Easy Lemon Condensed Milk Pie stands out as a testament to the beauty of simplicity. Its delightful combination of flavors and textures creates not just a dish but a moment—a slice of sunshine you can savor at any time. So, gather your ingredients, put on your apron, and embark on this delicious journey. Allow your kitchen to echo with the sweet notes of lemony bliss and the laughter of shared memories. Trust me; you won’t be disappointed!
PrintEasy Lemon Condensed Milk Pie

A refreshing lemon pie with a creamy condensed milk filling, perfect for summer gatherings.
- Prep Time: 15 minutes
- Cook Time: 0 minutes
- Total Time: 135 minutes
- Yield: 8 servings 1x
- Category: Dessert
- Method: No-Bake
- Cuisine: American
- Diet: Vegetarian
Ingredients
- 1 cup fresh lemon juice
- 1 can (14 oz) sweetened condensed milk
- 1 graham cracker crust
- Optional: whipped cream for topping
Instructions
- Mix the fresh lemon juice and sweetened condensed milk in a mixing bowl until smooth.
- Pour the filling into the prepared graham cracker crust, spreading evenly.
- Chill the pie for at least 120 minutes or until set.
- Serve chilled, topped with whipped cream if desired.
Notes
Use fresh lemons for the best flavor. Chill time is crucial for a firm pie.
Nutrition
- Serving Size: 1 slice
- Calories: 230
- Sugar: 27g
- Sodium: 150mg
- Fat: 9g
- Saturated Fat: 5g
- Unsaturated Fat: 4g
- Trans Fat: 0g
- Carbohydrates: 36g
- Fiber: 1g
- Protein: 2g
- Cholesterol: 20mg
Keywords: lemon pie, dessert, summer, easy pie, no-bake dessert