
No-Bake Biscoff & Nutella Dream Bars
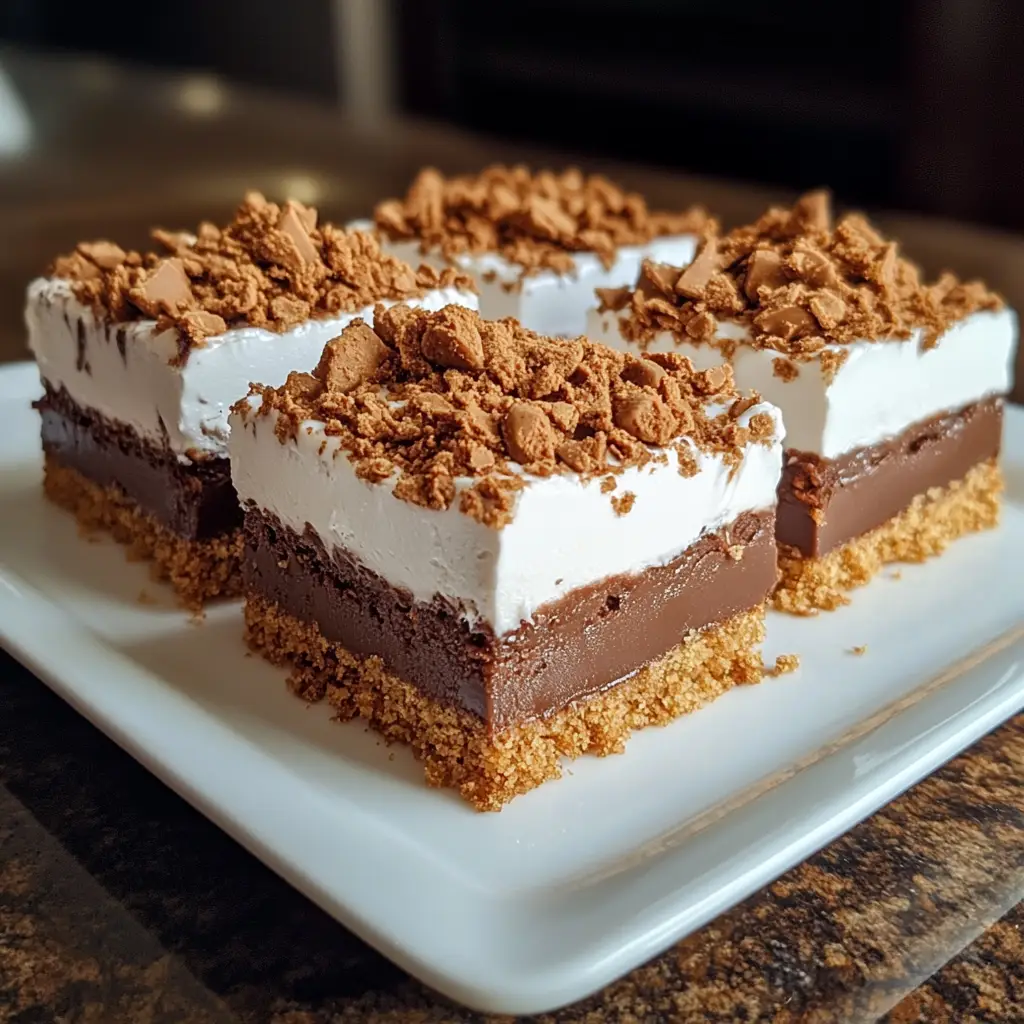
Introduction to No-Bake Biscoff & Nutella Dream Bars
Hey there, fellow food lovers! If you’re anything like me, you know that life can get pretty hectic. Between juggling work, family, and everything in between, finding time to whip up a delicious dessert can feel like a daunting task. That’s where these No-Bake Biscoff & Nutella Dream Bars come in! They’re the perfect quick solution for a busy day or a delightful treat to impress your loved ones. With just a handful of ingredients and no oven required, you’ll have a sweet indulgence ready in no time. Trust me, your taste buds will thank you!
Why You’ll Love This No-Bake Biscoff & Nutella Dream Bars
These No-Bake Biscoff & Nutella Dream Bars are a game-changer for busy moms and professionals alike. They come together in just 15 minutes, making them a breeze to prepare. Plus, the combination of creamy Nutella and crunchy Biscoff cookies creates a flavor explosion that’s simply irresistible. Whether you’re treating yourself or sharing with friends, these bars are sure to bring smiles all around!
Ingredients for No-Bake Biscoff & Nutella Dream Bars
Let’s gather our ingredients for these delightful No-Bake Biscoff & Nutella Dream Bars. Each one plays a crucial role in creating that dreamy flavor and texture. Here’s what you’ll need:
- Biscoff cookie crumbs: These provide a sweet, spiced base that’s simply irresistible. You can crush whole Biscoff cookies if you can’t find pre-made crumbs.
- Unsalted butter: This helps bind the crust together and adds richness. If you prefer a dairy-free option, coconut oil works well too!
- Nutella: The star of the show! This creamy hazelnut spread adds a luscious layer of flavor. You can substitute it with any chocolate-hazelnut spread you love.
- Sweetened condensed milk: This sweetens the Nutella layer and gives it a smooth, creamy texture. If you’re looking for a lighter option, try using evaporated milk, but the taste will differ.
- Chocolate chips: These add a delightful crunch and extra chocolatey goodness on top. Feel free to use dark, milk, or even white chocolate chips based on your preference.
- Biscoff spread: A drizzle of this on top enhances the Biscoff flavor. If you can’t find it, a simple chocolate drizzle will do the trick!
For exact measurements, check the bottom of the article where you can find everything listed for easy printing. Now, let’s get ready to create some magic in the kitchen!
How to Make No-Bake Biscoff & Nutella Dream Bars
Now that we have our ingredients ready, let’s dive into the fun part—making these No-Bake Biscoff & Nutella Dream Bars! Follow these simple steps, and you’ll be enjoying a delicious treat in no time.
Step 1: Prepare the Crust
Start by mixing the Biscoff cookie crumbs with the melted butter in a bowl. Stir until everything is well combined. The mixture should resemble wet sand.
Next, press this crumbly goodness firmly into the bottom of a lined baking dish. I like to use the back of a measuring cup to get an even layer. This crust is the foundation of our bars, so make sure it’s nice and compact!
Step 2: Make the Nutella Layer
In a separate bowl, combine the Nutella and sweetened condensed milk. Mix until smooth and creamy. This layer is where the magic happens!
Once combined, pour this luscious mixture over the crust. Use a spatula to spread it evenly. The Nutella layer should be thick and rich, just like a dream!
Step 3: Add Toppings
Now it’s time to sprinkle those chocolate chips on top. Feel free to go wild with the amount! Then, drizzle the Biscoff spread over the chocolate chips. This adds a beautiful swirl and extra flavor.
For a little crunch, you can also toss in some chopped nuts or even a sprinkle of sea salt. It’s all about personal preference!
Step 4: Chill and Set
Cover the baking dish with plastic wrap and pop it in the refrigerator. Let it chill for at least two hours, or overnight for a firmer texture. Patience is key here!
Once set, remove the bars from the dish and cut them into squares. Serve them chilled, and watch everyone’s eyes light up with joy!
Tips for Success
- Use a sharp knife to cut the bars for clean edges.
- For a fun twist, add a pinch of cinnamon to the crust.
- Let the bars sit at room temperature for a few minutes before serving for easier slicing.
- Store leftovers in an airtight container in the fridge for up to a week.
- Experiment with different toppings like crushed cookies or sprinkles!
Equipment Needed
- Baking dish: A 9×9 inch dish works perfectly. You can also use a similar-sized pan.
- Mixing bowls: Have a couple of medium-sized bowls on hand for mixing ingredients.
- Spatula: A rubber spatula is great for spreading the Nutella layer evenly.
- Measuring cups: Essential for accurate ingredient measurements.
- Plastic wrap: To cover the dish while chilling in the fridge.
Variations
- Nut-Free Option: Swap Nutella for a sunbutter or almond butter to cater to nut allergies.
- Gluten-Free Version: Use gluten-free Biscoff cookies or any gluten-free cookie crumbs for the crust.
- Vegan Delight: Replace butter with coconut oil and use a dairy-free chocolate spread to make it vegan-friendly.
- Fruit Twist: Add a layer of sliced bananas or strawberries on top of the Nutella layer for a fruity touch.
- Spiced Up: Mix in a teaspoon of pumpkin spice or cinnamon into the Nutella layer for a warm, cozy flavor.
Serving Suggestions
- Pair these No-Bake Biscoff & Nutella Dream Bars with a scoop of vanilla ice cream for a delightful contrast.
- Serve alongside a hot cup of coffee or a chilled glass of milk to enhance the flavors.
- For a beautiful presentation, dust with powdered sugar or cocoa powder before serving.
- Garnish with fresh berries or mint leaves for a pop of color.
FAQs about No-Bake Biscoff & Nutella Dream Bars
Got questions about these delightful No-Bake Biscoff & Nutella Dream Bars? I’ve got you covered! Here are some common queries that might pop up as you whip up this sweet treat.
Can I make these bars ahead of time?
Absolutely! These bars are perfect for making ahead. Just prepare them, chill, and store them in the fridge. They’ll stay fresh for up to a week!
What if I don’t have Biscoff cookies?
No worries! You can use any cookie crumbs you have on hand, like graham crackers or Oreos. Just adjust the flavor to your liking!
Can I freeze the No-Bake Biscoff & Nutella Dream Bars?
Yes, you can! Just wrap them tightly in plastic wrap and store them in an airtight container. They’ll keep well in the freezer for up to three months.
How do I store leftovers?
Store any leftovers in an airtight container in the fridge. They’ll stay delicious and ready to enjoy for up to a week!
Can I customize the toppings?
Definitely! Feel free to get creative with toppings. Nuts, sprinkles, or even a drizzle of caramel can add a fun twist to your bars!
Final Thoughts
Making these No-Bake Biscoff & Nutella Dream Bars is more than just a cooking experience; it’s a delightful journey filled with sweet moments. The joy of creating something so delicious with minimal effort is truly rewarding. Whether you’re sharing them with family or enjoying a quiet moment to yourself, these bars bring smiles and satisfaction. Plus, the compliments you’ll receive will make your heart swell with pride! So, roll up your sleeves, gather your ingredients, and let the magic unfold in your kitchen. You won’t regret it, and your taste buds will thank you!
PrintNo-Bake Biscoff & Nutella Dream Bars You Must Try!
Delicious and easy-to-make no-bake bars combining the flavors of Biscoff cookies and Nutella.
- Prep Time: 15 minutes
- Cook Time: 0 minutes
- Total Time: 2 hours 15 minutes
- Yield: 12 bars 1x
- Category: Dessert
- Method: No-Bake
- Cuisine: American
- Diet: Vegetarian
Ingredients
- 1 cup Biscoff cookie crumbs
- 1/2 cup unsalted butter, melted
- 1 cup Nutella
- 1 cup sweetened condensed milk
- 1/2 cup chocolate chips
- 1/4 cup Biscoff spread
Instructions
- In a bowl, mix Biscoff cookie crumbs and melted butter until well combined.
- Press the mixture into the bottom of a lined baking dish to form the crust.
- In another bowl, combine Nutella and sweetened condensed milk, then pour over the crust.
- Sprinkle chocolate chips on top and drizzle with Biscoff spread.
- Refrigerate for at least 2 hours until set.
- Cut into bars and serve.
Notes
- For a firmer texture, refrigerate overnight.
- Feel free to add nuts or other toppings as desired.
Nutrition
- Serving Size: 1 bar
- Calories: 250
- Sugar: 20g
- Sodium: 50mg
- Fat: 15g
- Saturated Fat: 7g
- Unsaturated Fat: 8g
- Trans Fat: 0g
- Carbohydrates: 30g
- Fiber: 1g
- Protein: 3g
- Cholesterol: 15mg
Keywords: No-Bake Biscoff & Nutella Dream Bars, dessert, easy recipe