
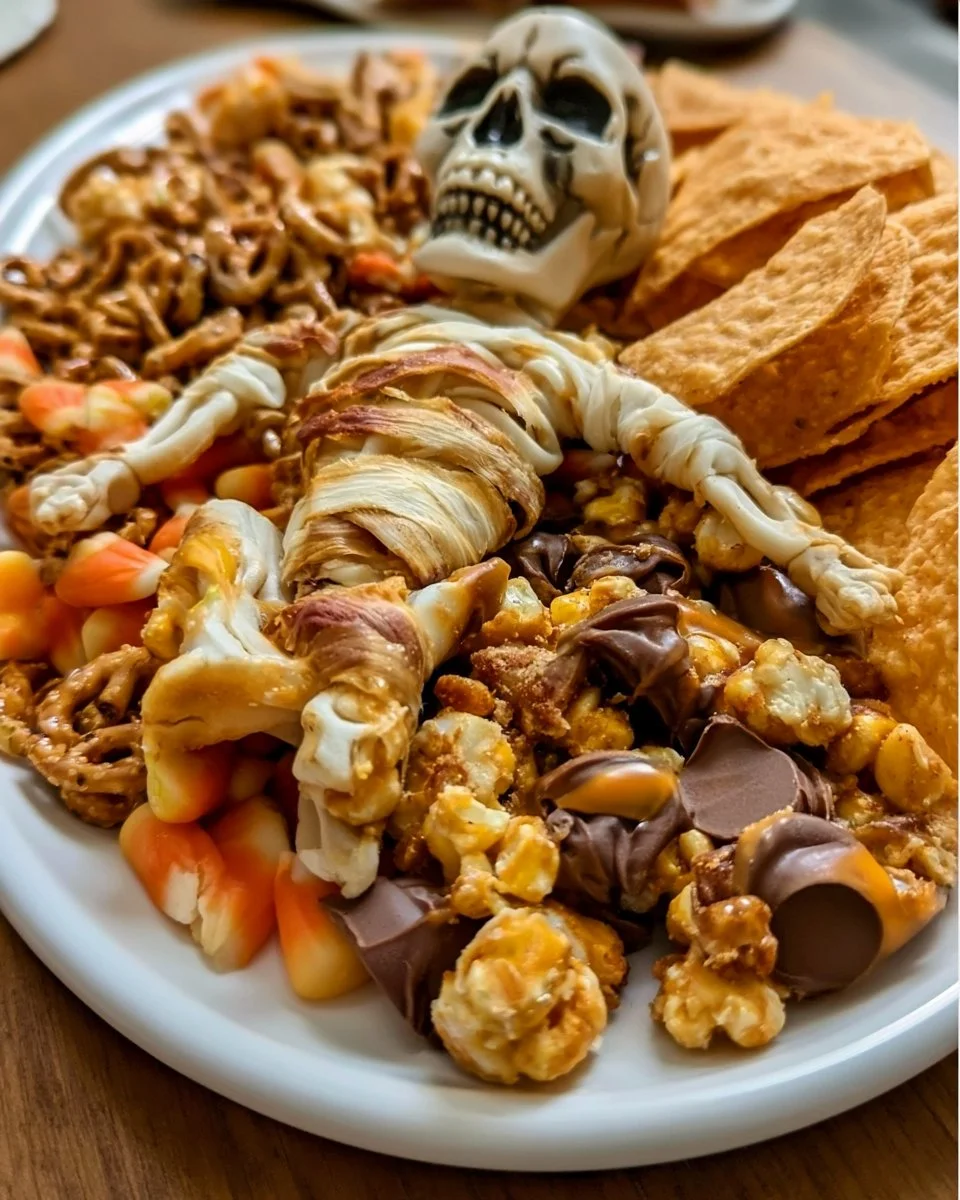
Halloween Snacks
Few seasons cast a spell on our taste buds quite like Halloween. The air crackles with excitement, swirling with whispers of pumpkin spice and sugary treats. The scent of caramel coated apples and freshly baked goodies wafting from kitchens fills the atmosphere with a sense of joy and nostalgia. As the leaves crunch beneath our feet and twilight descends, we gather with friends and family around table laden with delightful snacks that spark conversation and laughter. No matter how old we become, the magic of Halloween rekindles the child within us and invites us to indulge in fun, creative, and, needless to say, scrumptious snacks.
Imagine peeling back layers of trickery to unveil treats that not only tantalize the palate but also delight the senses with their spooky charm. Colorful candies, savory bites, and whimsical designs transform ordinary gatherings into playful celebrations. Halloween snacks become a canvas for creativity, providing a perfect opportunity to craft delectable delights that can evoke a delightful gasp or hearty laughter from partygoers. Sink your teeth into the crunchy, creamy, and sweet textures, and let the flavors transport you to a world where candy corn rains from the skies and caramel flows like rivers.
Why You’ll Love This Halloween Snack
This Halloween, elevate your festivities with snacks that are not just delicious but bursting with personality. The beauty of Halloween snacks lies in their versatility. From sweet to savory, every creation can reflect the spirit of the season. You’ll impress friends, family, and even those adventurous trick-or-treaters with your culinary presentations that fetch smiles as easily as they offer flavor.
The delightful experience they offer makes them a must-have for gatherings, whether you’re hosting a spooky movie night, a lively costume party, or simply gathering with loved ones to celebrate the season. Each bite carries a sense of fun, inviting everyone to join in the playful spirit of Halloween. The combination of textures—from creamy to crunchy, soft to crispy—ensures that there’s something for every palate. You won’t just taste the snacks; you’ll feel them, making memories with every bite.
Preparation Phase & Tools to Use
Creating memorable Halloween snacks begins with having the right tools at your disposal. Gather these essentials to streamline your cooking process and enhance your presentation:
- Mixing Bowl: A large, sturdy bowl helps combine your ingredients efficiently, enabling you to create smooth batters or uniform mixtures for treats.
- Baking Sheets: These trays make it easy to spread your creations and bake them evenly. Silicone mats can prevent sticking and foster easy clean-up.
- Whisk and Wooden Spoon: Perfect for mixing batters, whisking liquids, or blending together dry ingredients; the right tool makes a world of difference in texture.
- Cookie Cutters: Fun shapes add a festive twist to your creations. Use seasonal designs like pumpkins, ghosts, or bats to enchant your guests.
- Piping Bags: Ideal for decorating cupcakes or drizzling chocolate over snacks, these bags allow for creative flair in your presentations.
Preparation tips to ensure success:
- Read through the entire recipe before starting.
- Pre-measure your ingredients for efficiency.
- Have all your tools within easy reach to keep the creativity flowing.
Ingredients for Halloween Snacks
Each ingredient plays a pivotal role in crafting these enchanting snacks. Here’s a closer look:
- Chocolate: Dark, milk, or white chocolate can transform your Halloween snacks into delightful treats. They can be melted for drizzling, coating, or even molding into spooky shapes.
- Colorful Sprinkles: Edible glitter and Halloween-themed sprinkles add a playful touch and universal appeal—everyone loves sprinkles!
- Pumpkin Puree: This rich, creamy base infuses your treats with moisture and a seasonal spiced flavor, perfect for brownies or cakes.
- Crushed Graham Crackers: Offering a hint of sweetness and crunch, crushed graham crackers are a fantastic base for no-bake desserts or as a crust for spooky cheesecakes.
Want to switch things up? You can use carob or white chocolate for various dietary preferences, along with gluten-free graham crackers for those avoiding gluten.
How to Make Halloween Snacks
Crafting these tantalizing Halloween treats is a delight. Follow these step-by-step instructions to bring your spooky visions to life:
-
Prepare Your Workspace: Clear and clean your kitchen surface. Gather all your tools and ingredients. Preheat your oven as required (generally around 350°F).
-
Create Your Base: If you’re making a cookie or brownie base, whisk together your wet ingredients (like eggs, sugars, and pumpkin puree) in a mixing bowl until smooth.
-
Incorporate Dry Ingredients: Gradually fold in the dry ingredients, taking care not to overmix. This will ensure that your snacks remain tender and chewy.
-
Shape Your Treats: Use cookie cutters to stamp out shapes or scoop dollops onto baking sheets lined with parchment paper. Create recognizable Halloween shapes for added charm.
-
Bake: Place your creations in the preheated oven and set a timer. As they bake, your kitchen will fill with mouth-watering aromas that will entice everyone near.
-
Decorate: Once cooled, unleash your creativity. Use melted chocolate and piping bags to create spooky designs or drizzle over your treats. Add sprinkles, edible eyes, or spooky toppings to enhance the festive feel.
-
Serve and Enjoy: Arrange your snacks on colorful platters. Invite everyone to dig in and revel in the exciting flavors of Halloween.
Chef’s Notes & Helpful Tips
- Make-Ahead Tips: Prepare your snacks a day in advance. This allows the flavors to meld beautifully and keeps you stress-free on party day.
- Cooking Alternatives: If you prefer a healthier option or quicker cooking time, use an air fryer for cookies or fritters. Adjust the temperatures and times accordingly for optimal results.
- Customization Ideas: Spice things up by adding nuts or dried fruit for added texture. For a rich caramel bite, swirl in caramel sauce into brownies or cakes before baking.
Common Mistakes to Avoid
Avoiding pitfalls while creating your Halloween snacks ensures smooth sailing in the kitchen. Here are some missteps to steer clear of:
- Overmixing the Batter: This can lead to dense snacks. Mix just until combined for that perfect chewy texture.
- Ignoring Oven Temperature: Always preheat your oven. A cold oven delays baking and can affect texture and doneness.
- Not Cooling Before Decorating: Always let baked items cool completely to avoid melted decorations and a soupy mess.
What to Serve With Halloween Snacks
Pair your delightful snacks with complementary treats to enhance every gathering:
- Pumpkin Spice Hot Chocolate: Rich and creamy, it elevates the seasonal flavors.
- Ghostly Marshmallow Dip: Serve with fruit for a sweet balance and add ghostly charm to the table.
- Witch’s Brew Punch: This fruity drink adds a refreshing splash while meshing with the theme.
- Cheese and Cracker Platter: A savory counterpoint to the array of sweet treats that creates balance.
- Candy Corn Cocktails: Colorful cocktails bring festive fun to any adult gathering.
- Spicy Pumpkin Seeds: Add a crunchy twist that contrasts beautifully with soft snacks and elevates your spread.
- Apple Slices with Caramel Dip: The perfect juxtaposition to enrich your sweet snack offerings.
- Mini Ghost Pizzas: A savory option adorned with cheese and olives—perfectly thematic yet simple.
Storage & Reheating Instructions
To maintain the freshness of your Halloween snacks:
- Fridge: Store them in an airtight container at room temperature for 2-3 days. For cookies, keep them in a container with a slice of bread to retain moisture.
- Freezer: You can freeze up to 3 months; wrap them tightly in plastic wrap before placing them in freezer bags.
- Reheating: For best results, thaw at room temperature. If you prefer warming, place snacks in a preheated oven for a few minutes to revive texture before serving.
Estimated Nutrition Information
While exact values depend on specific ingredients, here’s an approximate breakdown per serving:
- Calories: 200-250
- Protein: 3-5g
- Carbohydrates: 30-35g
- Fats: 10-15g
Note: This is an estimation and can vary based on brands and substitutions used.
FAQs
1. Can I make these snacks vegan?
Absolutely! Substitute eggs with flax eggs or applesauce, and use dairy-free chocolate to ensure everyone enjoys your spooky bites.
2. How do I prevent my snacks from sticking?
Ensure to grease baking sheets or use parchment paper for non-sticky baking. This simple step drastically reduces frustration during clean-up.
3. What decorations can I use for my Halloween snacks?
Get creative! Use edible glitter, colored icing, chocolate drizzles, or themed cupcake picks to elevate your treats visually.
4. How long will these snacks last?
When stored properly, most snacks last 2-3 days at room temperature or up to three months in the freezer.
5. Can I make these gluten-free?
Definitely! Select gluten-free flour or utilize almond or coconut flour to adapt these delicious treats for everyone to savor.
Conclusion
So this Halloween, embrace the whimsical and the delicious with these engaging snacks that promise to enchant your guests. Every bite invites cheer, while your creativity twirls through the kitchen. Gather around, share stories, and enjoy the rich flavors, textures, and delightful surprises in each treat. Dive into the spirit of the season, and let your culinary prowess shine bright, creating memories that will be savored long after the last crumb has vanished. Happy Haunting!