
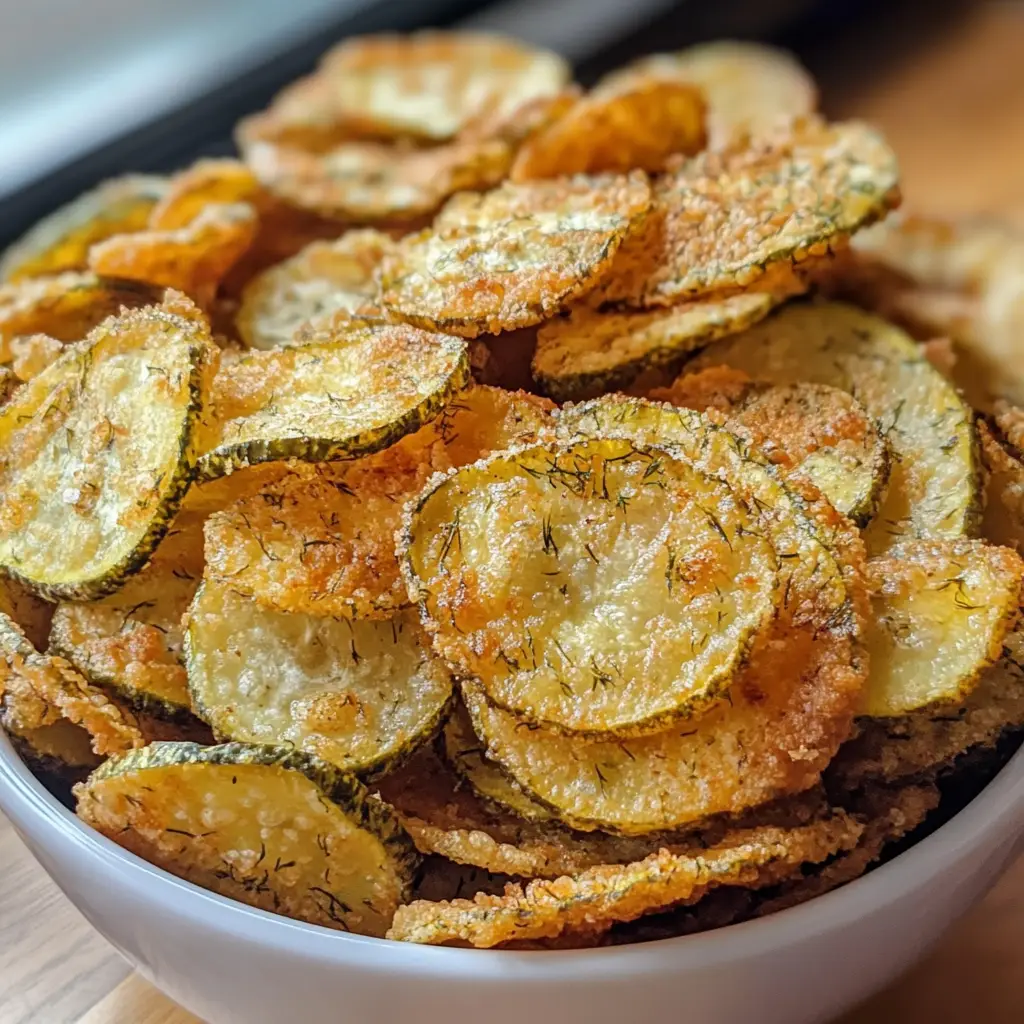
Fried Dill Pickle Chips
Introduction to Fried Dill Pickle Chips
Hey there, fellow food lovers! If you’re anything like me, you know that life can get pretty hectic. Between juggling work, family, and everything in between, finding time to whip up a delicious snack can feel like a challenge. That’s where these Fried Dill Pickle Chips come in! They’re not just a crunchy delight; they’re a quick solution for those busy days when you need something tasty to impress your loved ones. With their tangy flavor and crispy coating, these pickle chips are sure to be a hit at any gathering or cozy night in!
Why You’ll Love This Fried Dill Pickle Chips
These Fried Dill Pickle Chips are a game-changer for busy moms and professionals alike. They’re incredibly easy to make, taking just 25 minutes from start to finish. The crispy, golden exterior gives way to a tangy burst of flavor that’s simply irresistible. Plus, they’re perfect for parties or a cozy movie night at home. Trust me, once you try them, you’ll be hooked!
Ingredients for Fried Dill Pickle Chips
Gathering the right ingredients is the first step to creating these delightful Fried Dill Pickle Chips. Here’s what you’ll need:
- Dill pickles: The star of the show! Choose your favorite brand or homemade pickles for that tangy flavor.
- All-purpose flour: This forms the base of your coating, giving the chips a nice crunch.
- Cornmeal: Adds a delightful texture and a hint of sweetness to the coating.
- Garlic powder: A must for flavor! It brings a savory depth that complements the pickles.
- Onion powder: This enhances the overall taste, making each bite more flavorful.
- Paprika: For a touch of smokiness and color, paprika is a fantastic addition.
- Salt: Essential for seasoning, it helps to bring out the flavors of the other ingredients.
- Black pepper: A little kick! It adds a subtle heat that balances the tanginess of the pickles.
- Eggs: These act as a binder, helping the coating stick to the pickles.
- Buttermilk: This adds moisture and a slight tang, making the coating even more delicious.
- Oil for frying: Choose a neutral oil with a high smoke point, like vegetable or canola oil, for frying.
For those looking to mix things up, consider adding spices like cayenne pepper for heat or Italian seasoning for a twist. You can find the exact quantities for each ingredient at the bottom of the article, ready for printing!
How to Make Fried Dill Pickle Chips
Now that you have all your ingredients ready, let’s dive into the fun part: making these Fried Dill Pickle Chips! Follow these simple steps, and you’ll have a crunchy snack that’s sure to impress.
Step 1: Prepare the Pickles
Start by draining the dill pickle slices. This step is crucial! You want to remove excess moisture so that your chips can get that perfect crunch. After draining, pat them dry with paper towels. Trust me, this little trick makes a big difference!
Step 2: Mix the Coating
In a large bowl, combine the all-purpose flour, cornmeal, garlic powder, onion powder, paprika, salt, and black pepper. This flavorful coating is what makes your Fried Dill Pickle Chips so irresistible. Mix it well until all the dry ingredients are evenly distributed. The aroma will have you excited already!
Step 3: Prepare the Egg Mixture
In another bowl, whisk together the eggs and buttermilk. This mixture acts as a binding agent, helping the coating stick to the pickles. Make sure it’s well combined; you want a smooth consistency. It’s like a little hug for your pickles!
Step 4: Coat the Pickles
Now comes the fun part! Dip each pickle slice into the egg mixture, ensuring it’s fully coated. Then, roll it in the flour mixture until it’s well covered. This double-dipping technique gives your chips that extra crispy texture. Who doesn’t love a little crunch?
Step 5: Heat the Oil
In a deep fryer or large skillet, heat oil over medium-high heat. You want enough oil to submerge the pickle slices, but not so much that it splatters everywhere. A good test is to drop a small piece of the coating into the oil; if it sizzles, you’re ready to fry!
Step 6: Fry the Pickles
Carefully add the coated pickle slices to the hot oil in batches. Fry them until they’re golden brown, about 2-3 minutes per side. Keep an eye on them; you want that perfect crunch without burning. The sizzling sound is music to my ears!
Step 7: Drain and Serve
Once they’re golden and crispy, remove the pickle chips from the oil and let them drain on paper towels. This helps absorb any excess oil. Serve them warm with your favorite dipping sauce, and watch them disappear in no time!
Tips for Success
- For extra crunch, double dip your pickle slices in the egg and flour mixture.
- Make sure your oil is hot enough before frying; this prevents sogginess.
- Don’t overcrowd the pan; fry in batches for even cooking.
- Experiment with spices in the coating for unique flavors.
- Serve immediately for the best texture; they’re best enjoyed fresh!
Equipment Needed
- Deep fryer or large skillet: A deep fryer is ideal, but a skillet works just as well.
- Mixing bowls: Use two bowls for the egg and flour mixtures.
- Whisk: Perfect for blending the egg mixture smoothly.
- Slotted spoon: Great for removing the fried pickles from the oil.
- Paper towels: Essential for draining excess oil after frying.
Variations
- Spicy Fried Dill Pickle Chips: Add cayenne pepper or crushed red pepper flakes to the coating for a fiery kick.
- Cheesy Dill Pickle Chips: Mix in some grated Parmesan or cheddar cheese into the flour mixture for a cheesy twist.
- Gluten-Free Option: Substitute all-purpose flour with a gluten-free flour blend and use gluten-free cornmeal.
- Herbed Dill Pickle Chips: Incorporate dried herbs like dill, oregano, or thyme into the coating for an aromatic flavor.
- Sweet and Spicy Pickles: Use sweet pickle slices instead of dill for a unique flavor profile that balances sweetness and spice.
Serving Suggestions
- Pair your Fried Dill Pickle Chips with a zesty ranch or spicy sriracha dipping sauce for an extra flavor boost.
- Serve alongside crispy potato wedges or a fresh garden salad for a complete meal.
- For drinks, consider a chilled lemonade or a light beer to complement the tangy pickles.
- Present them on a colorful platter with fresh herbs for a pop of color.
FAQs about Fried Dill Pickle Chips
Can I use other types of pickles for this recipe?
Absolutely! While dill pickles are traditional, you can experiment with bread and butter pickles or even spicy pickles for a different flavor. Just keep in mind that the sweetness or heat will change the overall taste of your Fried Dill Pickle Chips.
How do I store leftover Fried Dill Pickle Chips?
To keep your Fried Dill Pickle Chips crispy, store them in an airtight container at room temperature. They’re best enjoyed fresh, but if you have leftovers, they can be reheated in the oven for a few minutes to regain some crunch.
Can I make these Fried Dill Pickle Chips ahead of time?
Yes! You can prepare the pickle slices and coating in advance. Just coat the pickles right before frying to ensure they stay crispy. This makes it easy to whip them up quickly when guests arrive!
What dipping sauces pair well with Fried Dill Pickle Chips?
There are so many delicious options! Classic ranch dressing, zesty sriracha mayo, or even a tangy honey mustard sauce work wonderfully. Feel free to get creative and find your favorite pairing!
Are Fried Dill Pickle Chips suitable for a vegetarian diet?
Yes, these Fried Dill Pickle Chips are vegetarian-friendly! They’re made with simple ingredients that fit perfectly into a vegetarian lifestyle. Enjoy them guilt-free!
Final Thoughts
Making Fried Dill Pickle Chips is more than just cooking; it’s about creating joyful moments. The crunch of each chip, paired with that tangy flavor, brings back memories of family gatherings and laughter. Whether you’re serving them at a party or enjoying them during a cozy night in, these chips are sure to delight. Plus, they’re a fantastic way to get everyone involved in the kitchen. So, roll up your sleeves, gather your loved ones, and dive into this delicious adventure. Trust me, you’ll be savoring every crispy bite!
PrintFried Dill Pickle Chips: A Crunchy Snack Delight!
Fried Dill Pickle Chips are a crunchy and tangy snack that combines the flavors of dill pickles with a crispy coating, perfect for parties or as a tasty appetizer.
- Prep Time: 15 minutes
- Cook Time: 10 minutes
- Total Time: 25 minutes
- Yield: 4 servings 1x
- Category: Snack
- Method: Frying
- Cuisine: American
- Diet: Vegetarian
Ingredients
- 1 jar dill pickles, sliced
- 1 cup all-purpose flour
- 1 cup cornmeal
- 1 teaspoon garlic powder
- 1 teaspoon onion powder
- 1 teaspoon paprika
- 1/2 teaspoon salt
- 1/2 teaspoon black pepper
- 2 large eggs
- 1 cup buttermilk
- Oil for frying
Instructions
- Drain the dill pickle slices and pat them dry with paper towels.
- In a bowl, mix together the flour, cornmeal, garlic powder, onion powder, paprika, salt, and black pepper.
- In another bowl, whisk together the eggs and buttermilk.
- Dip each pickle slice into the egg mixture, then coat it in the flour mixture.
- Heat oil in a deep fryer or large skillet over medium-high heat.
- Fry the coated pickle slices in batches until golden brown, about 2-3 minutes per side.
- Remove from oil and drain on paper towels.
- Serve warm with your favorite dipping sauce.
Notes
- For extra crunch, double dip the pickle slices in the egg and flour mixture.
- These can be made ahead of time and reheated in the oven for a few minutes.
- Experiment with different spices in the coating for varied flavors.
Nutrition
- Serving Size: 1 serving (about 5 chips)
- Calories: 250
- Sugar: 2g
- Sodium: 600mg
- Fat: 15g
- Saturated Fat: 2g
- Unsaturated Fat: 10g
- Trans Fat: 0g
- Carbohydrates: 25g
- Fiber: 2g
- Protein: 5g
- Cholesterol: 50mg
Keywords: Fried Dill Pickle Chips, Snack, Appetizer, Crunchy Snack