
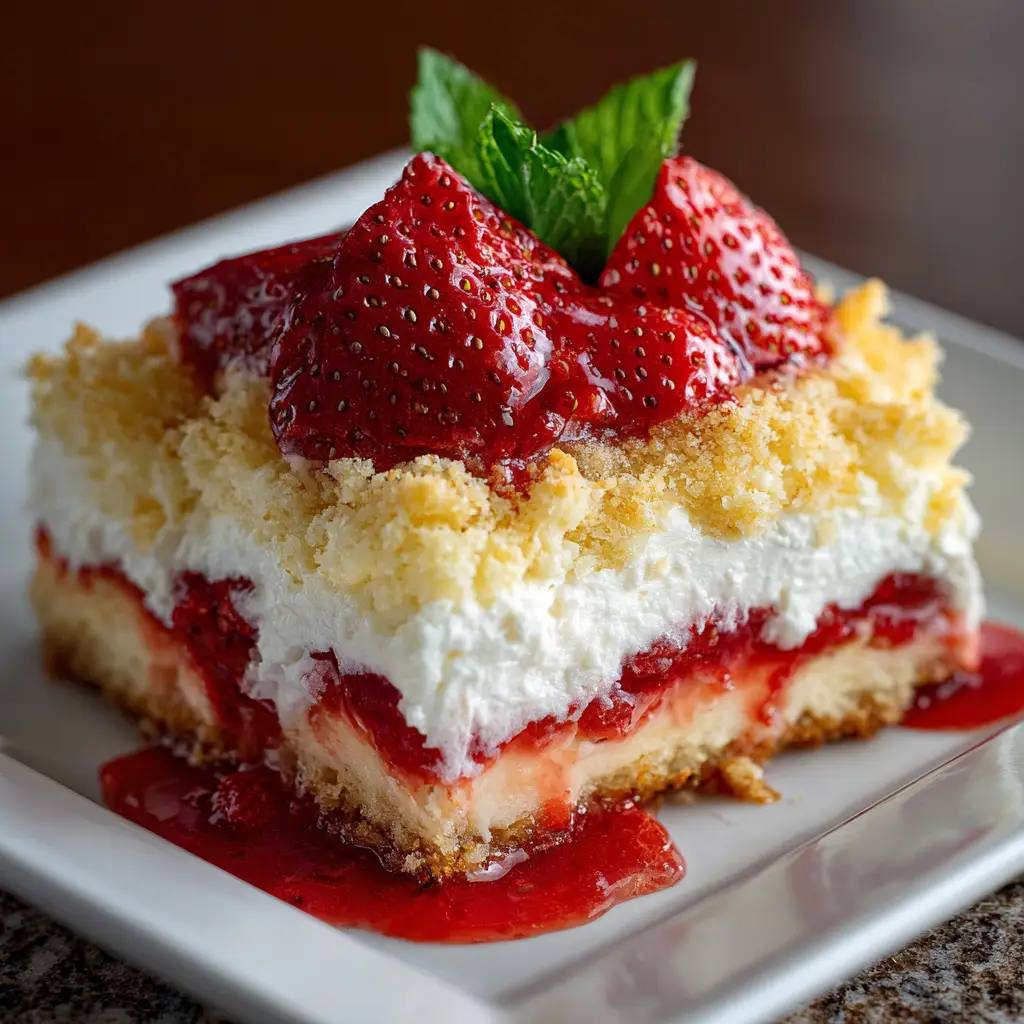
Strawberry Cheesecake Dump Cake: A Simple Delight!
Introduction to Strawberry Cheesecake Dump Cake
As a busy mom, I know how precious time can be, especially when it comes to whipping up something sweet for my family. That’s why I absolutely adore this Strawberry Cheesecake Dump Cake! It’s a delightful dessert that combines the luscious flavors of strawberries and creamy cheesecake, all in a simple dump cake format. With just a few ingredients and minimal effort, you can create a show-stopping treat that will impress your loved ones. Whether it’s a last-minute gathering or a cozy family dinner, this recipe is your go-to solution for a quick and delicious dessert!
Why You’ll Love This Strawberry Cheesecake Dump Cake
This Strawberry Cheesecake Dump Cake is a dream come true for busy cooks like us! It’s incredibly easy to make, requiring just a few simple steps. The taste? Oh, it’s a heavenly blend of sweet strawberries and creamy cheesecake that will have everyone asking for seconds. Plus, it bakes in just 30-35 minutes, making it perfect for those hectic days when you need a quick yet impressive dessert. Trust me, you’ll fall in love!
Ingredients for Strawberry Cheesecake Dump Cake
Gathering the right ingredients is half the fun of baking! For this Strawberry Cheesecake Dump Cake, you’ll need a few staples that you might already have in your pantry. Here’s what you’ll need:
- Yellow cake mix: This is the base of our cake, providing a light and fluffy texture. You can use any brand you prefer.
- Strawberry pie filling: This sweet and fruity filling adds a burst of flavor. Feel free to use homemade if you have some on hand!
- Cream cheese: Softened cream cheese gives that rich cheesecake flavor. Make sure it’s at room temperature for easy mixing.
- Butter: Melted butter adds moisture and richness to the cake. I always opt for unsalted to control the saltiness.
- Powdered sugar: This sweetener helps create a smooth cream cheese mixture. It dissolves easily, making it perfect for frosting or fillings.
- Vanilla extract: A splash of vanilla enhances the overall flavor, making everything taste even better.
- Milk: Pouring milk over the cake mix ensures a moist and tender cake. You can use any type of milk you prefer, including almond or oat milk for a dairy-free option.
For those who like to experiment, you can substitute the strawberry pie filling with other fruit pie fillings like blueberry or cherry. The exact quantities for each ingredient are listed at the bottom of the article, ready for you to print out and take to the kitchen!
How to Make Strawberry Cheesecake Dump Cake
Now that we have our ingredients ready, let’s dive into the fun part—making this Strawberry Cheesecake Dump Cake! Follow these simple steps, and you’ll have a delicious dessert in no time.
Step 1: Preheat the Oven
First things first, preheat your oven to 350°F (175°C). Preheating is crucial because it ensures that your cake bakes evenly. A hot oven helps the cake rise beautifully, giving it that perfect fluffy texture we all love.
Step 2: Prepare the Cream Cheese Mixture
In a large mixing bowl, combine the softened cream cheese, powdered sugar, and vanilla extract. Use a hand mixer or a whisk to blend everything until it’s smooth and creamy. This mixture is the heart of your cheesecake flavor, so make sure there are no lumps!
Step 3: Layer the Strawberry Filling
Next, grab your greased 9×13 inch baking dish and spread the strawberry pie filling evenly across the bottom. This fruity layer is what makes this dump cake so special. Don’t be shy—make sure it’s well-covered!
Step 4: Add the Cake Mix
Now, it’s time to pour the yellow cake mix over the strawberry filling. Just sprinkle it evenly, covering the fruit layer completely. No need to mix it in; the magic happens in the oven!
Step 5: Drizzle with Butter
Take your melted butter and drizzle it generously over the cake mix. This step adds moisture and richness, making every bite heavenly. Just let it flow like a warm river over the dry mix!
Step 6: Pour the Milk
Finally, pour the milk over the top of everything. This will help keep the cake moist as it bakes. It’s like giving your cake a little spa treatment before it heads into the oven!
Step 7: Bake to Perfection
Pop your baking dish into the preheated oven and let it bake for 30-35 minutes. Keep an eye on it! You’ll know it’s done when the top is golden brown and a toothpick inserted in the center comes out clean. The aroma will be irresistible!
Step 8: Cool and Serve
Once baked, let your cake cool slightly before serving. This will help it set a bit more. Serve it warm, and if you’re feeling indulgent, top it with whipped cream or a scoop of ice cream. Trust me, it’s the cherry on top of this delightful dessert!
Tips for Success
- Make sure your cream cheese is softened for easy mixing.
- Grease your baking dish well to prevent sticking.
- Don’t skip the milk; it keeps the cake moist and tender.
- Check for doneness a few minutes early to avoid overbaking.
- Let the cake cool slightly before serving for the best texture.
Equipment Needed
- 9×13 inch baking dish: A standard size for this recipe; you can use any similar-sized dish.
- Mixing bowls: A large bowl for the cream cheese mixture and a smaller one for any prep.
- Hand mixer or whisk: For blending the cream cheese; a whisk works just fine if you prefer a workout!
- Measuring cups and spoons: Essential for accurate ingredient measurements.
Variations
- Berry Medley: Swap out the strawberry pie filling for a mix of blueberries, raspberries, and blackberries for a delightful berry medley.
- Chocolate Lovers: Add chocolate chips to the cream cheese mixture for a rich chocolate twist that pairs beautifully with strawberries.
- Gluten-Free Option: Use a gluten-free yellow cake mix to make this dessert suitable for those with gluten sensitivities.
- Vegan Version: Substitute the cream cheese with a vegan cream cheese alternative and use a plant-based milk for a dairy-free treat.
- Nutty Crunch: Sprinkle chopped nuts, like pecans or almonds, on top of the cake mix before baking for added texture and flavor.
Serving Suggestions
- Serve warm with a dollop of whipped cream or a scoop of vanilla ice cream for extra indulgence.
- Pair with fresh strawberries on the side for a pop of color and freshness.
- Drizzle with chocolate or caramel sauce for a decadent touch.
- Garnish with mint leaves for a beautiful presentation.
FAQs about Strawberry Cheesecake Dump Cake
As you embark on your journey to create this delightful Strawberry Cheesecake Dump Cake, you might have a few questions. Here are some common queries that I’ve encountered, along with helpful answers to guide you along the way!
Can I use fresh strawberries instead of pie filling?
Absolutely! While the recipe calls for strawberry pie filling for convenience, you can use fresh strawberries. Just slice them and mix with a bit of sugar to create a sweet layer. It’ll add a fresh twist!
How do I store leftovers?
Store any leftovers in an airtight container in the refrigerator. It should stay fresh for up to three days. Just reheat in the microwave for a few seconds before serving!
Can I make this dessert ahead of time?
Yes! You can prepare the layers ahead of time and assemble them just before baking. This is a great way to save time on busy days!
What can I substitute for cream cheese?
If you’re looking for a lighter option, you can use Greek yogurt or a dairy-free cream cheese alternative. Both will still give you that creamy texture!
Is this recipe suitable for a crowd?
Definitely! This Strawberry Cheesecake Dump Cake yields 12 servings, making it perfect for gatherings or potlucks. Just double the recipe if you need more!
Final Thoughts
Creating this Strawberry Cheesecake Dump Cake is more than just baking; it’s about sharing joy with those you love. The delightful aroma wafting through your kitchen will bring everyone together, sparking smiles and sweet memories. This recipe is a reminder that even on the busiest days, you can whip up something special with minimal effort. Whether it’s a family gathering or a cozy night in, this cake is sure to be a hit. So, roll up your sleeves, embrace the mess, and enjoy the delicious rewards of your culinary adventure!
PrintStrawberry Cheesecake Dump Cake: A Simple Delight!
A delicious and easy-to-make dessert that combines the flavors of strawberry and cheesecake in a simple dump cake format.
- Prep Time: 15 minutes
- Cook Time: 35 minutes
- Total Time: 50 minutes
- Yield: 12 servings 1x
- Category: Dessert
- Method: Baking
- Cuisine: American
- Diet: Vegetarian
Ingredients
- 1 box of yellow cake mix
- 1 can of strawberry pie filling
- 8 oz cream cheese, softened
- 1/2 cup butter, melted
- 1/2 cup powdered sugar
- 1 tsp vanilla extract
- 1/2 cup milk
Instructions
- Preheat the oven to 350°F (175°C).
- In a large mixing bowl, combine the softened cream cheese, powdered sugar, and vanilla extract until smooth.
- Spread the strawberry pie filling evenly in the bottom of a greased 9×13 inch baking dish.
- Pour the yellow cake mix evenly over the strawberry filling.
- Drizzle the melted butter over the cake mix.
- Pour the milk over the top.
- Bake for 30-35 minutes or until golden brown and a toothpick comes out clean.
- Let it cool slightly before serving.
Notes
- Serve warm with whipped cream or ice cream for added flavor.
- Can substitute other fruit pie fillings if desired.
- Store leftovers in the refrigerator for up to 3 days.
Nutrition
- Serving Size: 1 slice
- Calories: 250
- Sugar: 20g
- Sodium: 200mg
- Fat: 10g
- Saturated Fat: 5g
- Unsaturated Fat: 3g
- Trans Fat: 0g
- Carbohydrates: 35g
- Fiber: 1g
- Protein: 3g
- Cholesterol: 30mg
Keywords: Strawberry Cheesecake Dump Cake, easy dessert, dump cake, strawberry dessert