
Pumpkin Pie Ice Cream
Introduction to Pumpkin Pie Ice Cream
As the leaves turn golden and the air gets crisp, there’s nothing quite like the comforting taste of fall. That’s where my Pumpkin Pie Ice Cream comes in—a delightful blend of creamy goodness and classic pumpkin pie flavors. This recipe is perfect for busy moms and professionals like us, offering a quick solution to satisfy those sweet cravings. Imagine serving this luscious treat to your loved ones, bringing smiles and warmth to your home. Trust me, this is one dessert that will make you the star of any gathering!
Why You’ll Love This Pumpkin Pie Ice Cream
This Pumpkin Pie Ice Cream is a game-changer for your fall dessert lineup. It’s incredibly easy to whip up, taking just 15 minutes of prep time. Plus, the flavors are a delightful nod to the classic pumpkin pie we all adore. With its creamy texture and spiced notes, it’s a treat that will impress your family and friends without the fuss. Who doesn’t love a dessert that’s both simple and scrumptious?
Ingredients for Pumpkin Pie Ice Cream
Gathering the right ingredients is the first step to creating your delicious Pumpkin Pie Ice Cream. Here’s what you’ll need:
- Heavy Cream: This is the base of your ice cream, providing that rich, creamy texture we all love.
- Pumpkin Puree: The star of the show! It gives the ice cream its signature flavor and beautiful color. You can use canned or homemade puree.
- Sweetened Condensed Milk: This adds sweetness and creaminess, making your ice cream extra indulgent.
- Vanilla Extract: A splash of vanilla enhances the overall flavor, making it even more delightful.
- Ground Cinnamon: This warm spice is essential for that classic pumpkin pie taste.
- Ground Nutmeg: Just a pinch adds depth and a hint of warmth to the flavor profile.
- Ground Ginger: This spice brings a zesty kick that complements the pumpkin beautifully.
- Salt: A little salt balances the sweetness and enhances all the flavors.
Feel free to get creative! You can add crushed graham crackers for a pie crust texture or even swap in different spices if you prefer. For exact measurements, check the bottom of the article where you can find everything available for printing.
How to Make Pumpkin Pie Ice Cream
Now that you have your ingredients ready, let’s dive into the fun part—making your Pumpkin Pie Ice Cream! This process is straightforward and enjoyable, perfect for a cozy afternoon in the kitchen. Follow these simple steps, and you’ll have a delightful treat in no time!
Step 1: Combine the Base Ingredients
Start by grabbing a large mixing bowl. In it, combine the heavy cream, pumpkin puree, and sweetened condensed milk. Use a spatula or a whisk to mix them together. You want everything to blend seamlessly, creating a luscious base for your ice cream. The heavy cream gives it that rich texture, while the pumpkin puree adds flavor and color.
Step 2: Add Flavorings
Next, it’s time to amp up the flavor! Add the vanilla extract, ground cinnamon, ground nutmeg, ground ginger, and salt to the mixture. Each of these ingredients plays a vital role in creating that classic pumpkin pie taste. Stir gently to ensure the spices are evenly distributed throughout the mixture. The aroma will be heavenly!
Step 3: Whisk Until Smooth
Now, grab your whisk and get to work! Whisk the mixture thoroughly until it’s smooth and creamy. This step is crucial because it helps incorporate air into the mixture, making your ice cream light and fluffy. Plus, it ensures that all those delicious flavors meld together beautifully. You’ll know it’s ready when there are no lumps left!
Step 4: Churn the Mixture
Pour the smooth mixture into your ice cream maker. Follow the manufacturer’s instructions for churning. Typically, this process takes about 20-30 minutes. As it churns, you’ll see it transform into a thick, creamy ice cream. This is where the magic happens! If you don’t have an ice cream maker, don’t worry—there are no-churn methods available too!
Step 5: Freeze the Ice Cream
Once your ice cream has reached the desired consistency, transfer it to an airtight container. Make sure to smooth the top with a spatula. Seal it tightly and pop it in the freezer for at least 4 hours, or until it’s firm. This step is essential for achieving that perfect scoopable texture. Patience is key here!
Step 6: Serve and Enjoy
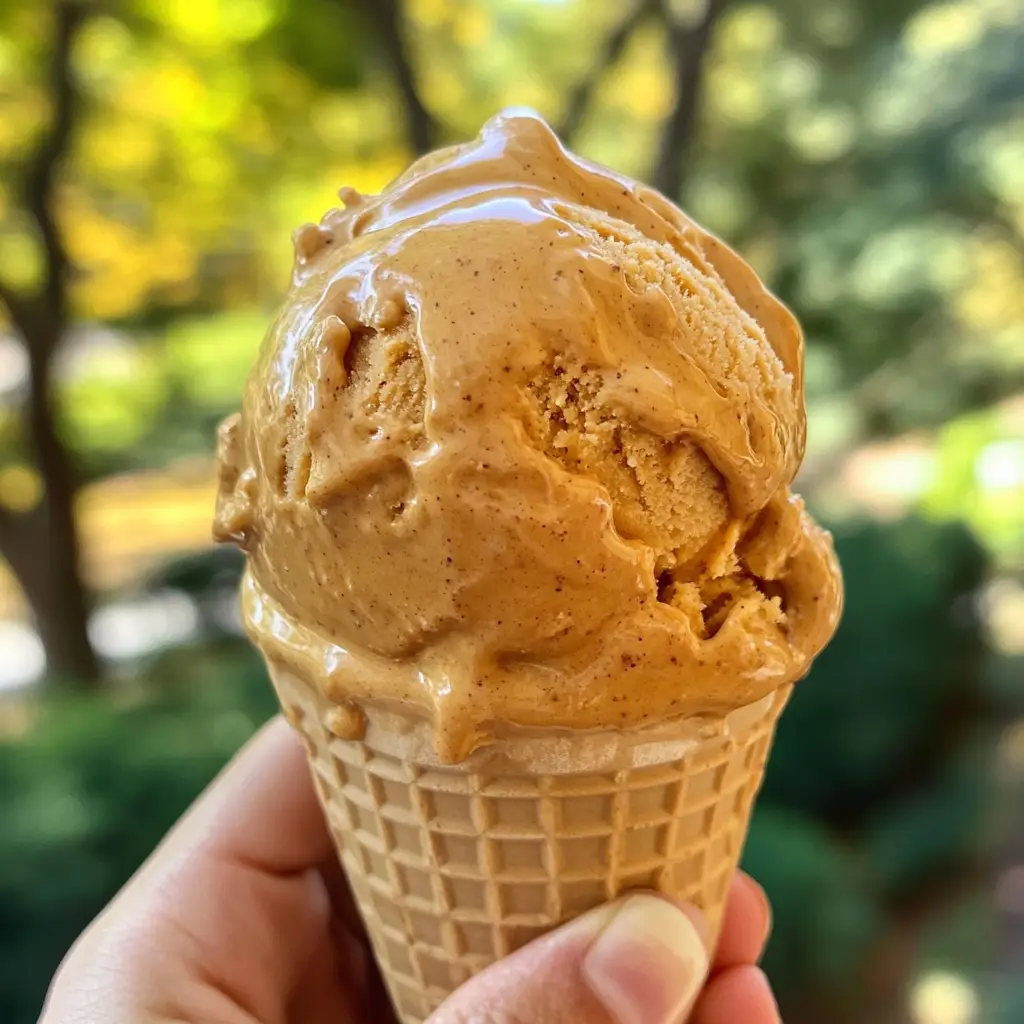
Finally, it’s time to indulge! Scoop the Pumpkin Pie Ice Cream into bowls or cones. You can even top it with whipped cream or a sprinkle of cinnamon for an extra touch. Whether you’re enjoying it on a chilly evening or serving it at a gathering, this ice cream is sure to be a hit. Get ready for compliments!
Tips for Success
- Use cold ingredients for a creamier texture; chill your heavy cream and pumpkin puree beforehand.
- Don’t skip the whisking step; it’s key to achieving that light, fluffy ice cream.
- For a fun twist, try adding a splash of bourbon or rum for an adult version.
- Keep your ice cream maker bowl frozen for at least 24 hours for best results.
- Experiment with spices; a dash of allspice or cloves can add a unique flavor!
Equipment Needed
- Ice Cream Maker: Essential for churning. If you don’t have one, a blender or food processor can work in a pinch.
- Mixing Bowl: A large bowl for combining ingredients. Any size will do, just ensure it’s big enough!
- Whisk or Spatula: For mixing and smoothing the ice cream mixture.
- Airtight Container: To store your ice cream. A freezer-safe plastic or glass container works perfectly.
Variations of Pumpkin Pie Ice Cream
- Vegan Option: Substitute heavy cream with coconut cream and use a plant-based sweetened condensed milk for a dairy-free delight.
- Spiced Pumpkin Pie Ice Cream: Add a pinch of cardamom or cloves for an extra layer of warmth and spice.
- Chocolate Swirl: Drizzle in some chocolate syrup during the churning process for a delicious chocolate-pumpkin fusion.
- Nutty Crunch: Fold in chopped pecans or walnuts before freezing for a delightful crunch.
- Maple Pumpkin Pie Ice Cream: Replace sweetened condensed milk with maple syrup for a unique twist on sweetness.
Serving Suggestions for Pumpkin Pie Ice Cream
- Serve in waffle cones for a fun, crunchy experience.
- Top with whipped cream and a sprinkle of cinnamon for a festive touch.
- Pair with a slice of warm apple pie for a delightful dessert duo.
- Drizzle with caramel sauce for an extra layer of sweetness.
- Enjoy with a hot cup of spiced chai or coffee for a cozy treat.
FAQs about Pumpkin Pie Ice Cream
Can I make Pumpkin Pie Ice Cream without an ice cream maker?
Absolutely! If you don’t have an ice cream maker, you can pour the mixture into a shallow dish and freeze it. Stir every 30 minutes for the first 2-3 hours to break up any ice crystals. This will help achieve a smoother texture.
How long can I store Pumpkin Pie Ice Cream?
Your delicious Pumpkin Pie Ice Cream can be stored in the freezer for up to two weeks. Just make sure it’s in an airtight container to keep it fresh and prevent freezer burn.
Can I use fresh pumpkin instead of canned puree?
Yes, using fresh pumpkin puree is a great option! Just make sure to cook and blend it until smooth. It adds a lovely homemade touch to your ice cream.
What can I do if my ice cream is too hard after freezing?
If your Pumpkin Pie Ice Cream is too hard, let it sit at room temperature for about 10-15 minutes before scooping. This will soften it up, making it easier to serve.
Can I add mix-ins to my Pumpkin Pie Ice Cream?
Definitely! Feel free to fold in crushed graham crackers, chocolate chips, or nuts before freezing. This adds a delightful texture and flavor to your ice cream!
Final Thoughts
Creating this Pumpkin Pie Ice Cream is more than just making a dessert; it’s about embracing the flavors of fall and sharing joy with those you love. Each scoop is a reminder of cozy gatherings and cherished memories. The creamy texture and spiced notes will transport you to a warm kitchen filled with laughter and love. Whether you’re enjoying it on a quiet evening or serving it at a festive gathering, this ice cream is sure to bring smiles. So, roll up your sleeves and dive into this delightful treat—your taste buds will thank you!
PrintPumpkin Pie Ice Cream: A Delicious Fall Treat Awaits!
Pumpkin Pie Ice Cream is a creamy and flavorful dessert that combines the classic taste of pumpkin pie with the refreshing texture of ice cream, making it a perfect treat for the fall season.
- Prep Time: 15 minutes
- Cook Time: 0 minutes
- Total Time: 4 hours 15 minutes
- Yield: 6 servings 1x
- Category: Dessert
- Method: Ice Cream Maker
- Cuisine: American
- Diet: Vegetarian
Ingredients
- 2 cups heavy cream
- 1 cup pumpkin puree
- 1 cup sweetened condensed milk
- 1 teaspoon vanilla extract
- 1 teaspoon ground cinnamon
- 1/2 teaspoon ground nutmeg
- 1/4 teaspoon ground ginger
- 1/4 teaspoon salt
Instructions
- In a large mixing bowl, combine the heavy cream, pumpkin puree, and sweetened condensed milk.
- Add the vanilla extract, ground cinnamon, ground nutmeg, ground ginger, and salt to the mixture.
- Whisk the ingredients together until well combined and smooth.
- Pour the mixture into an ice cream maker and churn according to the manufacturer’s instructions.
- Once churned, transfer the ice cream to an airtight container and freeze for at least 4 hours or until firm.
- Serve the pumpkin pie ice cream in bowls or cones and enjoy!
Notes
- For a richer flavor, use homemade pumpkin puree.
- Feel free to add crushed graham crackers for a pie crust texture.
- This ice cream can be stored in the freezer for up to 2 weeks.
Nutrition
- Serving Size: 1/2 cup
- Calories: 250
- Sugar: 20g
- Sodium: 50mg
- Fat: 15g
- Saturated Fat: 9g
- Unsaturated Fat: 6g
- Trans Fat: 0g
- Carbohydrates: 30g
- Fiber: 1g
- Protein: 3g
- Cholesterol: 50mg
Keywords: Pumpkin Pie Ice Cream, Fall Dessert, Ice Cream Recipe