
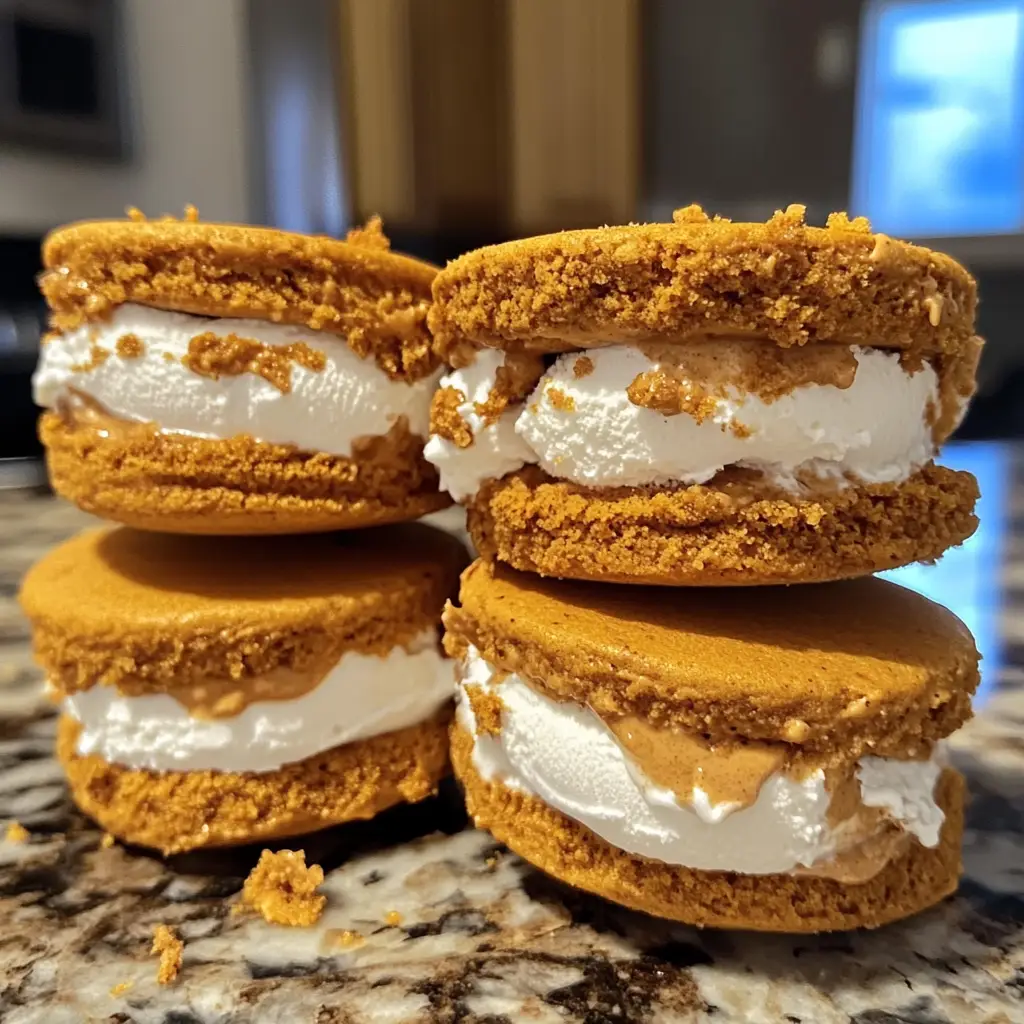
Pumpkin Cheesecake Ice Cream Sandwiches
Introduction to Pumpkin Cheesecake Ice Cream Sandwiches
As the leaves turn and the air gets crisp, I find myself craving the cozy flavors of fall. That’s why I absolutely adore these Pumpkin Cheesecake Ice Cream Sandwiches! They’re the perfect blend of creamy pumpkin goodness and sweet nostalgia, making them a delightful treat for busy days. Whether you’re looking to impress your family or simply indulge in a little self-care, this recipe is a quick solution that brings joy to any gathering. Plus, they’re no-bake, which means less time in the kitchen and more time enjoying the season!
Why You’ll Love This Pumpkin Cheesecake Ice Cream Sandwiches
These Pumpkin Cheesecake Ice Cream Sandwiches are a dream come true for busy moms and professionals alike. They’re incredibly easy to whip up, taking just 20 minutes of your time. The creamy pumpkin filling is a delightful taste of fall, while the cookies add a satisfying crunch. Plus, they can be made ahead and stored in the freezer, making them a perfect treat for unexpected guests or a sweet reward after a long day!
Ingredients for Pumpkin Cheesecake Ice Cream Sandwiches
Gathering the right ingredients is the first step to creating these delightful Pumpkin Cheesecake Ice Cream Sandwiches. Here’s what you’ll need:
- Pumpkin puree: This is the star of the show! It brings that rich, autumn flavor and creamy texture.
- Cream cheese: Softened cream cheese adds a luscious creaminess that balances the pumpkin perfectly.
- Sugar: A touch of sweetness to enhance the flavors. You can adjust this based on your taste preferences.
- Vanilla extract: This adds a warm, aromatic note that complements the pumpkin and spices beautifully.
- Pumpkin pie spice: A blend of cinnamon, nutmeg, and ginger that captures the essence of fall in every bite.
- Heavy cream: Whipping this until stiff peaks form creates a light, airy texture for the filling.
- Cookies: Choose your favorite cookies for the sandwiches. Chocolate chip, gingersnaps, or even gluten-free options work wonderfully!
Feel free to get creative! You can add chocolate chips or nuts for extra texture. If you’re looking for a gluten-free option, simply swap in gluten-free cookies. For exact measurements, check the bottom of the article where you can find everything available for printing.
How to Make Pumpkin Cheesecake Ice Cream Sandwiches
Step 1: Prepare the Pumpkin Mixture
Start by grabbing a mixing bowl and adding the pumpkin puree, softened cream cheese, sugar, vanilla extract, and pumpkin pie spice. Using a hand mixer or a whisk, blend these ingredients together until the mixture is smooth and creamy. This step is crucial because it sets the foundation for your Pumpkin Cheesecake Ice Cream Sandwiches. The aroma of pumpkin and spices will fill your kitchen, making it feel like fall has arrived. Trust me, you’ll want to taste this mixture before moving on!
Step 2: Whip the Cream
In a separate bowl, pour in the heavy cream. Using an electric mixer, whip the cream until stiff peaks form. This means that when you lift the beaters, the cream holds its shape and doesn’t droop. It’s like magic watching it transform! This whipped cream will add a light, airy texture to your filling, making your sandwiches feel indulgent yet light. Just be careful not to over-whip, or you might end up with butter instead of cream!
Step 3: Combine Mixtures
Now it’s time to bring the two mixtures together. Gently fold the whipped cream into the pumpkin mixture using a spatula. Be careful not to deflate the whipped cream; you want to keep that airy texture. This step is where the magic happens, as the creamy pumpkin filling becomes light and fluffy. The colors will blend beautifully, creating a delightful orange hue. Take a moment to appreciate how delicious this is going to be!
Step 4: Assemble the Sandwiches
Grab your cookies and spread a generous layer of the pumpkin cheesecake mixture onto half of them. Use a knife or a spatula for an even spread. Then, take the remaining cookies and gently press them on top to create your sandwiches. It’s like building a little pumpkin-flavored treasure! Make sure to press down gently so the filling doesn’t ooze out. These sandwiches are not just a treat; they’re a work of art!
Step 5: Freeze
Once your sandwiches are assembled, it’s time to freeze them. Place the sandwiches on a baking sheet lined with parchment paper and pop them in the freezer. Let them freeze for at least 4 hours, or until they’re firm. This step is essential for achieving that perfect ice cream texture. When you’re ready to serve, just pull them out and enjoy a taste of fall in every bite. Trust me, your family will be begging for more!
Tips for Success
- Make sure your cream cheese is softened for easy mixing.
- Chill your mixing bowls and beaters before whipping the cream for better results.
- Don’t skip the freezing step; it’s crucial for the right texture.
- Experiment with different cookie flavors to find your favorite combination.
- For a fun twist, add a sprinkle of crushed graham crackers on the filling!
Equipment Needed
- Mixing bowls: Use any size you have on hand; glass or stainless steel works best.
- Electric mixer: A hand mixer is perfect, but a whisk will do if you’re feeling strong!
- Spatula: A rubber spatula is ideal for folding and spreading.
- Baking sheet: Any flat surface will work for freezing your sandwiches.
- Parchment paper: Optional, but it makes cleanup a breeze!
Variations
- Chocolate Chip Pumpkin Cheesecake: Fold in mini chocolate chips for a delightful contrast to the pumpkin flavor.
- Nutty Delight: Add chopped walnuts or pecans to the filling for a crunchy texture.
- Spiced Up: Increase the pumpkin pie spice for a bolder flavor or add a pinch of cayenne for a surprising kick.
- Vegan Option: Substitute cream cheese with a vegan alternative and use coconut cream instead of heavy cream.
- Gluten-Free: Use gluten-free cookies to make these sandwiches suitable for those with dietary restrictions.
Serving Suggestions
- Pair these sandwiches with a warm cup of spiced chai or apple cider for a cozy treat.
- Serve alongside a simple green salad for a refreshing contrast.
- For a festive touch, garnish with a sprinkle of cinnamon or a dollop of whipped cream.
- Present on a beautiful platter for an eye-catching dessert display.
FAQs about Pumpkin Cheesecake Ice Cream Sandwiches
Can I make these Pumpkin Cheesecake Ice Cream Sandwiches ahead of time?
Absolutely! These sandwiches can be made a day or two in advance. Just store them in the freezer until you’re ready to serve. They’re perfect for busy days or unexpected guests!
What type of cookies work best for these sandwiches?
You can use any cookies you love! Chocolate chip, gingersnaps, or even oatmeal cookies are fantastic choices. Just make sure they’re sturdy enough to hold the filling without falling apart.
How long can I store the sandwiches in the freezer?
These Pumpkin Cheesecake Ice Cream Sandwiches can be stored in the freezer for up to two weeks. Just make sure they’re well-wrapped or in an airtight container to keep them fresh.
Can I use fresh pumpkin instead of canned puree?
Yes, you can! Just make sure to cook and puree the pumpkin until smooth. Canned pumpkin puree is convenient, but fresh pumpkin can add a lovely flavor and texture.
What can I do if I don’t have pumpkin pie spice?
No worries! You can easily make your own by mixing cinnamon, nutmeg, and ginger. A simple ratio is 2 teaspoons of cinnamon, 1 teaspoon of nutmeg, and 1 teaspoon of ginger for a homemade pumpkin pie spice blend.
Final Thoughts
Creating these Pumpkin Cheesecake Ice Cream Sandwiches is more than just making a dessert; it’s about embracing the warmth of fall and sharing joy with loved ones. Each bite is a delightful blend of creamy pumpkin and sweet nostalgia, perfect for any occasion. Whether you’re enjoying them after a long day or serving them at a gathering, these sandwiches are sure to bring smiles. Plus, the no-bake aspect means you can whip them up quickly, leaving you more time to savor the season. Trust me, once you try them, they’ll become a cherished tradition in your home!
PrintPumpkin Cheesecake Ice Cream Sandwiches You’ll Love!
Delicious pumpkin cheesecake ice cream sandwiches that combine the flavors of fall with a creamy dessert.
- Prep Time: 20 minutes
- Cook Time: 0 minutes
- Total Time: 4 hours 20 minutes
- Yield: 6 servings 1x
- Category: Dessert
- Method: No-bake
- Cuisine: American
- Diet: Vegetarian
Ingredients
- 1 cup pumpkin puree
- 1 cup cream cheese, softened
- 1/2 cup sugar
- 1 teaspoon vanilla extract
- 1 teaspoon pumpkin pie spice
- 1 cup heavy cream
- 12 cookies (your choice)
Instructions
- In a mixing bowl, combine pumpkin puree, cream cheese, sugar, vanilla extract, and pumpkin pie spice until smooth.
- In a separate bowl, whip the heavy cream until stiff peaks form.
- Gently fold the whipped cream into the pumpkin mixture until well combined.
- Spread the pumpkin cheesecake mixture onto half of the cookies.
- Top with the remaining cookies to create sandwiches.
- Freeze for at least 4 hours or until firm.
- Serve and enjoy your pumpkin cheesecake ice cream sandwiches!
Notes
- For a gluten-free option, use gluten-free cookies.
- These sandwiches can be made ahead of time and stored in the freezer.
- Feel free to add chocolate chips or nuts for extra texture.
Nutrition
- Serving Size: 1 sandwich
- Calories: 250
- Sugar: 15g
- Sodium: 150mg
- Fat: 15g
- Saturated Fat: 8g
- Unsaturated Fat: 5g
- Trans Fat: 0g
- Carbohydrates: 30g
- Fiber: 1g
- Protein: 3g
- Cholesterol: 30mg
Keywords: Pumpkin Cheesecake Ice Cream Sandwiches, Fall Desserts, No-bake Desserts