
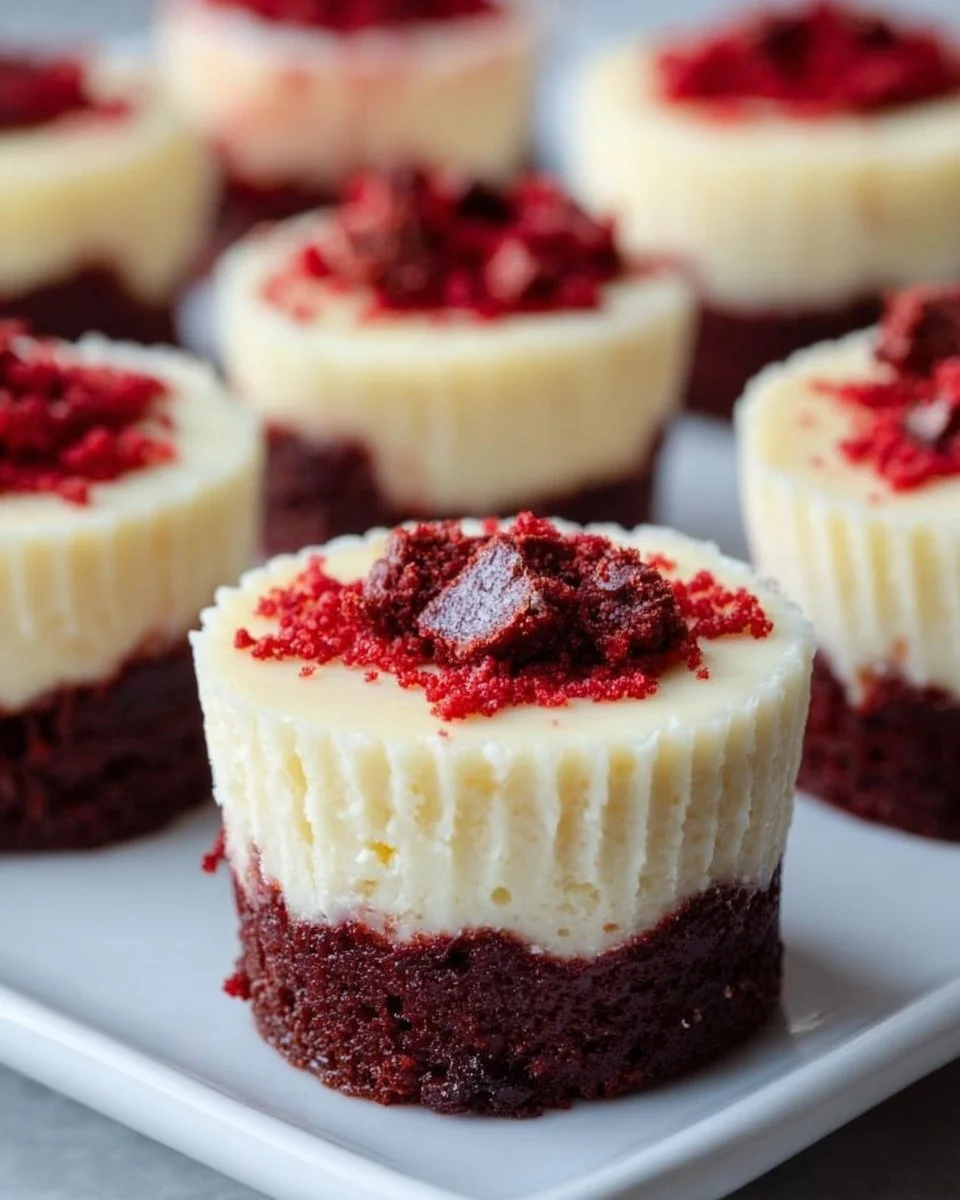
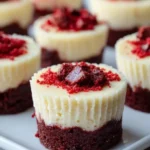
Mini Cheesecakes with Red Velvet Brownie Base
There’s something truly magical about the moment you take a bite of a mini cheesecake, the way the creamy filling melts effortlessly in your mouth, and your senses awaken to the surprise of the rich and decadent flavors beneath. Imagine a smooth layer of luscious cheesecake bliss gently resting atop a dense, red velvet brownie base that offers a delightful tug and chew with every forkful. As you close your eyes, the sweet aroma of baking chocolate and vanilla envelops you like a warm embrace, drawing you in deeper. Each mini cheesecake is not just a dessert; it’s an invitation to indulge in a symphony of textures and tastes, a celebration in each tiny bite.
With their vibrant red hue and velvety composition, these Mini Cheesecakes with Red Velvet Brownie Base are perfect for any occasion. Whether it’s a festive holiday gathering, a birthday party, or simply a cozy night at home, these little heart-stealers bring joy not just to the palate but also to the eyes. Picture serving them up on a beautiful platter, their rich color contrasting with the creamy white cheese topping—just beautiful enough to make you hesitate before taking that first bite. But don’t worry; you’ll soon find it hard to resist!
Why You’ll Love This Mini Cheesecake with Red Velvet Brownie Base
These mini cheesecakes stand out for a multitude of reasons. First and foremost, they marry two beloved desserts into one delightful package. The red velvet brownie base provides a faint cocoa flavor and the trademark moistness that contrasts beautifully with the velvety cheesecake. The combination is not just pleasing to the taste buds but also creates an unforgettable textural experience, with the crusty brownie layer juxtaposed against the silky filling.
Whether you’re celebrating a special occasion or craving something indulgent to share with friends, these mini cheesecakes always impress. They’re the kind of dessert that not only satisfies your sweet tooth but also offers a sense of nostalgia. You’ll find that their flavors echo memories of family gatherings, laughter, and sweet treats shared with loved ones. And with their individual servings, they make portion control easier—if you can resist going back for more!
Preparation Phase & Tools to Use
Before you dive into the delicious realm of mini cheesecake-making, gather these essential tools that will make your baking journey smoother:
- Mini Cheesecake Pan: This unique pan features removable bottoms so you can easily lift out your mini cheesecakes without any fuss. Plus, the mini sizes help in managing portions beautifully!
- Mixing Bowls: You’ll need a couple of wide mixing bowls; make sure one is large enough for mixing the brownie base and the other for the cream cheese filling.
- Hand Mixer or Stand Mixer: Either choice quickly achieves the desired smooth, creamy consistency for your cheesecake mixture. You don’t want any lumps!
- Spatula: A sturdy spatula makes it easy to fold in ingredients and scrape down the sides of your bowls for thorough mixing.
- Measuring Cups and Spoons: Precise measurements guarantee your mini cheesecakes come out perfectly balanced in flavor.
Preparation Tips:
- Ensure your cream cheese reaches room temperature for an effortlessly smooth filling.
- Read the instructions fully before beginning—an organized kitchen leads to a less stressful baking experience.
Ingredients for Mini Cheesecakes with Red Velvet Brownie Base
- 1 box red velvet brownie mix: This is your delightful base, providing warmth and a subtle cocoa burst. You can opt for a homemade brownie recipe if preferred.
- 1/2 cup butter, melted: Rich and flavorful, the butter adds moisture. Substitute with coconut oil for a dairy-free version.
- 1 egg: Essential for binding the brownie mix; a flax egg can be an alternative for a vegan option.
- 8 oz cream cheese, softened: This is the star of the show, delivering creamy richness. Use a block, not spreadable cream cheese for the best results.
- 1/2 cup sugar: Sweetness enhances the flavors; you may reduce this or use alternatives like coconut sugar or honey.
- 1 tsp vanilla extract: Aromatic and flavor-enhancing, vanilla rounds out the taste; pure extract is preferable.
- 1 egg: Adds airiness to your cheesecake mixture; the flax egg or even yogurt can be swaps if needed.
- 1/2 cup sour cream: This gives extra creaminess and tang. Greek yogurt is a good alternative.
- 1/4 cup all-purpose flour: Acts as a binding agent; for gluten-free options, you can use almond flour or a gluten-free blend.
How to Make Mini Cheesecakes with Red Velvet Brownie Base
- Preheat your oven to 350°F (175°C). Grease your mini cheesecake pan to ensure easy release.
- Prepare your brownie base: In a bowl, mix the red velvet brownie mix with the melted butter and 1 egg until fully combined. Pour the rich batter into each cavity of the mini cheesecake pan, filling them halfway.
- Make the cheesecake filling: In another bowl, beat softened cream cheese, sugar, and vanilla extract until smooth. Incorporate 1 egg, sour cream, and flour, mixing until luscious and homogenous.
- Pour the creamy mixture: Carefully pour the cream cheese filling over the red velvet brownie base in each cavity, filling them nearly to the top.
- Bake to perfection: Slide the pan into the preheated oven and bake for 20-25 minutes, or until a toothpick inserted in the center comes out clean.
- Cool down: Let your mini cheesecakes cool in the pan for about 10 minutes before gently removing them.
- Chill before serving: Place them in the fridge for at least 2 hours (trust me, the wait is worth it!) before enjoying.
Chef’s Notes & Helpful Tips
- Make-ahead tips: You can prepare the mini cheesecakes a day in advance. They taste even better after chilling overnight!
- Cooking alternatives: If you prefer, you can make these in an air fryer. Simply adjust your temperature to about 325°F (165°C) and check for doneness at the same interval.
- Customization ideas: Try adding a swirl of chocolate or raspberry puree to the cheesecake filling before baking for an exciting twist. Top with whipped cream and sprinkles for a celebratory touch.
Common Mistakes to Avoid
When crafting these mini cheesecakes, avoid overmixing the cream cheese filling, which can lead to cracks when baking. Make sure your cream cheese is at room temperature for a lump-free blend. Also, baking for too long can dry them out—keep an eye on them and do the toothpick test!
What to Serve With Mini Cheesecakes
Pair these decadent mini cheesecakes with a variety of accompaniments to elevate your dessert experience:
- Fresh Berries: Strawberries, raspberries, or blueberries add a pop of freshness and complement the sweetness beautifully.
- Whipped Cream: A dollop of cream adds a lightness that balances all the richness perfectly.
- Chocolate Sauce: Drizzling some warm chocolate can add an extra layer of decadence that chocolate lovers crave.
- Mint Leaves: A sprinkle of fresh mint adds a touch of refreshment and a beautiful color contrast.
- Caramel Sauce: The rich flavor of caramel brings a luxurious touch that enhances every bite.
- Ice Cream: Vanilla or cookies-and-cream ice cream gives a lovely contrast and temperature variance in every mouthful.
- Coffee or Espresso: The bitterness of coffee expertly balances the sweetness of the cheesecake, creating a perfect pairing for dessert lovers.
Storage & Reheating Instructions
Store leftover mini cheesecakes in an airtight container in the fridge for up to 5 days. They also freeze beautifully; just wrap them individually in plastic wrap and place them in a freezer-safe bag. To enjoy, simply thaw them in the refrigerator overnight. No reheating is necessary; they taste divine chilled!
Estimated Nutrition Information
Per mini cheesecake (approximately):
- Calories: 220
- Total Fat: 12g
- Saturated Fat: 7g
- Cholesterol: 70mg
- Carbohydrates: 24g
- Sugars: 15g
- Protein: 4g
*Values are approximate and may vary based on ingredient choices.
FAQs
Q: Can I use a different flavor of brownie mix?
A: Absolutely! Vanilla, chocolate, or even a peppermint brownie mix can make for exciting variations.
Q: Is it necessary to chill the cheesecakes before serving?
A: Yes, chilling allows the flavors to meld beautifully and gives the cheesecake its perfect texture.
Q: What if I don’t have a mini cheesecake pan?
A: You can use a muffin tin lined with paper liners, though the mini cheesecakes may not hold their shape as well.
Q: Can I make these gluten-free?
A: Yes, opt for a gluten-free brownie mix and substitute the all-purpose flour with a gluten-free alternative.
Q: What can I do with leftover cheesecake filling?
A: You can bake it in small ramekins for additional mini cheesecakes or swirl it into a brownie batter for a delightful marbled cake!
Conclusion
These Mini Cheesecakes with Red Velvet Brownie Base are a delightful culmination of rich flavors and inviting textures. They invite you to indulge, to celebrate, and to create cherished memories with each creamy bite. As you explore this recipe, let your creativity run wild—customize, savor them fresh, and share the joy with friends and family. Treat yourself to these mini miracles and discover how one simple dessert can create so much happiness! Happy baking!
PrintMini Cheesecakes with Red Velvet Brownie Base
These delightful mini cheesecakes combine a creamy filling atop a rich red velvet brownie base, perfect for any occasion.
- Prep Time: 15 minutes
- Cook Time: 25 minutes
- Total Time: 40 minutes
- Yield: 12 servings 1x
- Category: Dessert
- Method: Baking
- Cuisine: American
- Diet: Vegetarian
Ingredients
- 1 box red velvet brownie mix
- 1/2 cup butter, melted
- 1 egg
- 8 oz cream cheese, softened
- 1/2 cup sugar
- 1 tsp vanilla extract
- 1 egg
- 1/2 cup sour cream
- 1/4 cup all-purpose flour
Instructions
- Preheat your oven to 350°F (175°C) and grease your mini cheesecake pan.
- Mix the red velvet brownie mix with the melted butter and 1 egg until fully combined.
- Pour the batter into each cavity of the mini cheesecake pan, filling them halfway.
- Beat softened cream cheese, sugar, and vanilla extract until smooth.
- Incorporate 1 egg, sour cream, and flour, mixing until homogenous.
- Pour the cream cheese filling over the brownie base in each cavity, filling them nearly to the top.
- Bake for 20-25 minutes, or until a toothpick comes out clean.
- Cool for about 10 minutes before removing from the pan.
- Chill in the fridge for at least 2 hours before serving.
Notes
These mini cheesecakes can be made a day in advance and taste even better after chilling overnight. Customize with chocolate swirls or fresh toppings!
Nutrition
- Serving Size: 1 cheesecake
- Calories: 220
- Sugar: 15g
- Sodium: 200mg
- Fat: 12g
- Saturated Fat: 7g
- Unsaturated Fat: 5g
- Trans Fat: 0g
- Carbohydrates: 24g
- Fiber: 1g
- Protein: 4g
- Cholesterol: 70mg
Keywords: cheesecake, mini desserts, red velvet, brownie, baking