
“Hocus Pocus Halloween Cookies That Will Enchant You!”
Introduction to Hocus Pocus Halloween Cookies
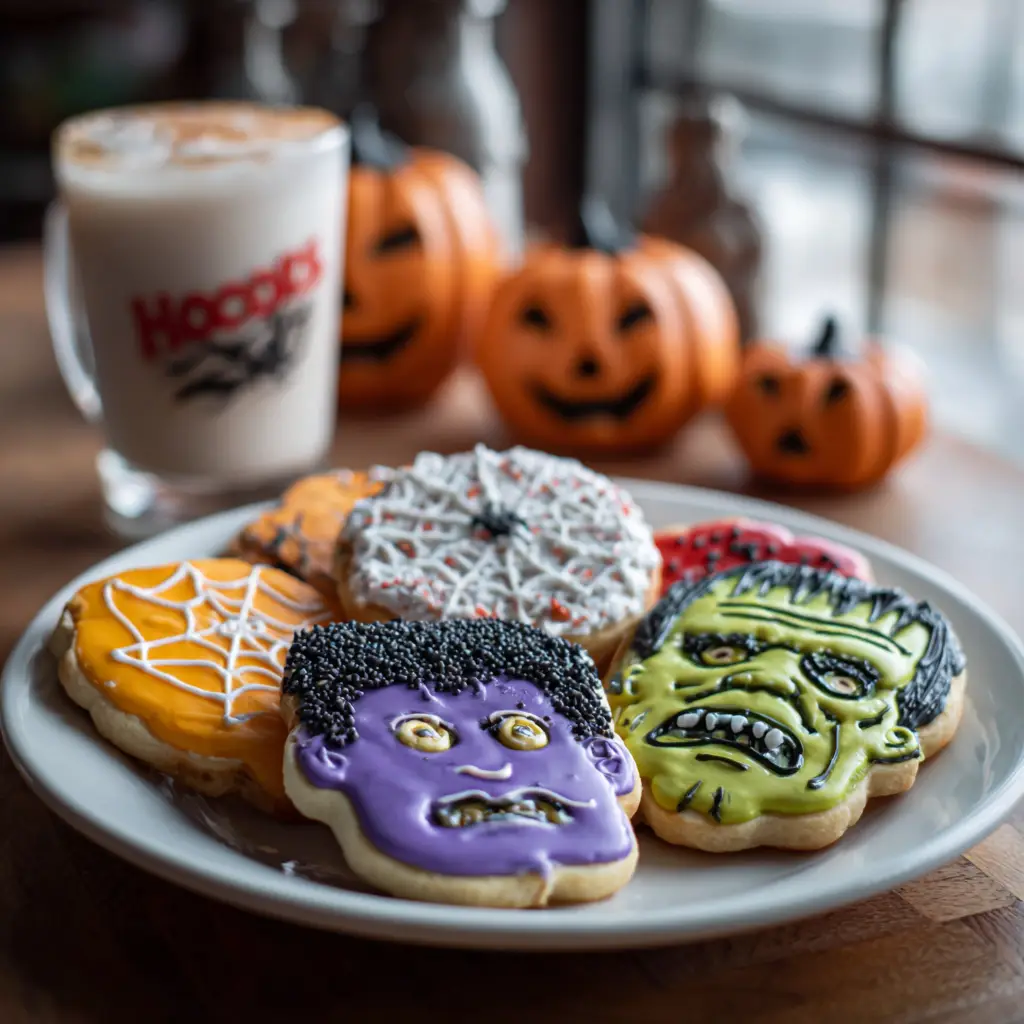
As the leaves turn and the air gets crisp, I can’t help but feel the magic of Halloween creeping in. What better way to celebrate than with delightful Hocus Pocus Halloween Cookies? These cookies are not just a treat; they’re a fun activity for the whole family! Whether you’re a busy mom juggling work and kids or a professional looking to impress at a Halloween gathering, this recipe is your go-to. With a sprinkle of creativity and a dash of love, you’ll whip up these enchanting cookies in no time!
Why You’ll Love This Hocus Pocus Halloween Cookies
These Hocus Pocus Halloween Cookies are a breeze to make, perfect for busy days when time is tight. With just a few simple steps, you can create delicious, spooky treats that will delight your family and friends. The vibrant colors and fun shapes add a festive touch to any Halloween celebration. Plus, the sweet aroma wafting through your kitchen will have everyone enchanted before they even take a bite!
Ingredients for Hocus Pocus Halloween Cookies
Gathering the right ingredients is the first step to conjuring up these magical Hocus Pocus Halloween Cookies. Here’s what you’ll need:
- All-purpose flour: This is the foundation of your cookies, giving them structure and a delightful chew.
- Baking powder: A leavening agent that helps your cookies rise, making them light and fluffy.
- Salt: Just a pinch enhances the sweetness and balances the flavors beautifully.
- Unsalted butter: Softened butter adds richness and helps create that melt-in-your-mouth texture.
- Granulated sugar: This sweetener gives your cookies their delightful sweetness and helps them brown nicely.
- Large egg: Eggs bind the ingredients together and add moisture, contributing to the cookie’s overall texture.
- Vanilla extract: A splash of vanilla adds warmth and depth to the flavor profile.
- Food coloring: Use green, purple, and orange to bring your cookies to life with festive hues!
- Royal icing: This is your decorating tool, perfect for adding spooky designs and details to your cookies.
For those looking to mix things up, consider using almond extract instead of vanilla for a nutty twist. You can also substitute half of the all-purpose flour with whole wheat flour for a healthier option. Remember, the exact measurements are at the bottom of the article, ready for you to print and keep handy!
How to Make Hocus Pocus Halloween Cookies
Now that you have your ingredients ready, let’s dive into the magical process of making these Hocus Pocus Halloween Cookies! Follow these simple steps, and you’ll have a batch of delightful cookies that are sure to impress.
Step 1: Preheat the Oven
First things first, preheat your oven to 350°F (175°C). Preheating is crucial because it ensures that your cookies bake evenly. If you skip this step, your cookies might spread too much or not rise properly. Trust me, a well-preheated oven is the secret to cookie perfection!
Step 2: Prepare the Dry Ingredients
In a mixing bowl, whisk together the all-purpose flour, baking powder, and salt. This step is essential for creating a uniform cookie base. Whisking helps to aerate the flour and evenly distribute the baking powder and salt. A well-mixed dry blend sets the stage for a delightful cookie texture!
Step 3: Cream the Butter and Sugar
In another bowl, cream the softened unsalted butter and granulated sugar together until the mixture is light and fluffy. This technique is vital for achieving a soft, tender cookie. The air you incorporate while creaming will help your cookies rise beautifully. Don’t rush this step; take your time to get that perfect creamy consistency!
Step 4: Add Egg and Vanilla
Next, add the large egg and vanilla extract to your butter-sugar mixture. Mix until well combined. The egg acts as a binder, holding everything together, while the vanilla adds a warm, inviting flavor. This combination is what makes your cookies taste so delightful!
Step 5: Combine Wet and Dry Ingredients
Gradually add the dry ingredients to the wet mixture, mixing until just combined. Be careful not to overwork the dough; this can lead to tough cookies. You want to mix until you see no more flour, but don’t worry if the dough looks a little crumbly. It will come together beautifully!
Step 6: Color the Dough
Now comes the fun part! Divide the dough into three portions and color each with your chosen food coloring. Use green, purple, and orange to create a festive look. Knead the color into the dough until it’s evenly distributed. This step not only adds visual appeal but also makes the baking process feel like a creative adventure!
Step 7: Shape the Cookies
Roll out each colored dough portion on a lightly floured surface to about 1/4 inch thick. Use your favorite Halloween cookie cutters to cut out fun shapes. Whether it’s ghosts, pumpkins, or witches, let your imagination run wild! Remember to keep the shapes consistent in thickness for even baking.
Step 8: Bake the Cookies
Place your shaped cookies on a baking sheet lined with parchment paper. Bake them in the preheated oven for 10-12 minutes. Keep an eye on them; they’re done when the edges are lightly golden. The centers may look a bit soft, but they will firm up as they cool!
Step 9: Cool and Decorate
Once baked, let the cookies cool on the baking sheet for a few minutes before transferring them to a wire rack. This cooling time is essential to prevent breakage. Once cooled, it’s time to unleash your creativity with royal icing! Decorate your cookies with spooky designs, and let the magic of Halloween shine through!
Tips for Success
- Chill the dough for 30 minutes before rolling to prevent sticking.
- Use a light dusting of flour on your work surface to make rolling easier.
- Experiment with different cookie cutter shapes for variety.
- Keep an eye on the cookies while baking; they can go from perfect to overdone quickly.
- Let the royal icing dry completely before stacking or storing the cookies.
Equipment Needed
- Mixing bowls: Use any size you have; just ensure they’re large enough for mixing.
- Whisk: A hand whisk works great, but an electric mixer can save time.
- Cookie cutters: Get creative! Use any shapes you have on hand.
- Baking sheet: A regular sheet works, but parchment paper makes cleanup easier.
- Wire rack: If you don’t have one, a plate will do for cooling.
Variations of Hocus Pocus Halloween Cookies
- Chocolate Chip Twist: Add mini chocolate chips to the dough for a delightful surprise in every bite.
- Gluten-Free Option: Substitute all-purpose flour with a gluten-free blend to accommodate dietary needs.
- Spiced Pumpkin Cookies: Incorporate pumpkin puree and spices like cinnamon and nutmeg for a seasonal twist.
- Nutty Flavor: Mix in chopped nuts, such as walnuts or pecans, for added texture and flavor.
- Vegan Version: Replace butter with coconut oil and use flax eggs for a plant-based alternative.
Serving Suggestions for Hocus Pocus Halloween Cookies
- Pair these cookies with a warm cup of apple cider for a cozy treat.
- Serve alongside spooky-themed cupcakes for a festive dessert table.
- Display cookies on a decorative platter with Halloween-themed decorations.
- Wrap cookies in clear bags tied with orange ribbons for party favors.
- Enjoy with a scoop of vanilla ice cream for a delightful dessert twist.
FAQs about Hocus Pocus Halloween Cookies
Can I make these cookies ahead of time?
Absolutely! You can prepare the dough in advance and refrigerate it for up to three days. Just remember to let it sit at room temperature for a few minutes before rolling it out. This way, you can enjoy the fun of baking without the last-minute rush!
How should I store my Hocus Pocus Halloween Cookies?
Store your cookies in an airtight container at room temperature. They’ll stay fresh for up to a week. If you want to keep them longer, consider freezing them. Just make sure to layer them with parchment paper to prevent sticking!
Can I use different colors for the icing?
Of course! Feel free to get creative with your royal icing colors. You can use any food coloring to match your Halloween theme. The more colorful, the better! Just remember to let each layer dry before adding more details.
What if my dough is too sticky?
If your dough feels sticky, don’t panic! Just sprinkle a little extra flour on your work surface and on the dough itself while rolling it out. Chilling the dough for about 30 minutes can also help make it easier to handle.
Can I make these cookies gluten-free?
Yes! Simply substitute the all-purpose flour with a gluten-free flour blend. Just make sure to check that your other ingredients, like baking powder, are also gluten-free. Enjoy the spooky fun without the gluten!
Final Thoughts
Making Hocus Pocus Halloween Cookies is more than just baking; it’s about creating memories with your loved ones. The laughter, the colorful dough, and the sweet aroma filling your kitchen all contribute to a magical experience. These cookies are perfect for sharing, whether at a Halloween party or a cozy family gathering. Plus, the joy of decorating them together can spark creativity in everyone. So, roll up your sleeves, gather your family, and let the enchantment of Halloween fill your home with these delightful treats. Trust me, they’ll be a hit!
Print“Hocus Pocus Halloween Cookies That Will Enchant You!”

Delicious and spooky cookies inspired by the movie Hocus Pocus, perfect for Halloween celebrations.
- Prep Time: 30 minutes
- Cook Time: 12 minutes
- Total Time: 42 minutes
- Yield: 24 cookies 1x
- Category: Dessert
- Method: Baking
- Cuisine: American
- Diet: Vegetarian
Ingredients
- 2 1/2 cups all-purpose flour
- 1 tsp baking powder
- 1/2 tsp salt
- 1 cup unsalted butter, softened
- 1 1/2 cups granulated sugar
- 1 large egg
- 1 tsp vanilla extract
- Food coloring (green, purple, orange)
- Royal icing for decoration
Instructions
- Preheat your oven to 350°F (175°C).
- In a bowl, whisk together flour, baking powder, and salt.
- In another bowl, cream the butter and sugar until light and fluffy.
- Add the egg and vanilla extract to the butter mixture and mix well.
- Gradually add the dry ingredients to the wet ingredients and mix until combined.
- Divide the dough into three portions and color each with food coloring.
- Roll out the dough and cut into Halloween shapes.
- Place cookies on a baking sheet and bake for 10-12 minutes.
- Let cool and decorate with royal icing.
Notes
- For best results, chill the dough for 30 minutes before rolling out.
- Use different cookie cutters for a variety of shapes.
- Store cookies in an airtight container for up to a week.
Nutrition
- Serving Size: 1 cookie
- Calories: 150
- Sugar: 10g
- Sodium: 50mg
- Fat: 7g
- Saturated Fat: 4g
- Unsaturated Fat: 2g
- Trans Fat: 0g
- Carbohydrates: 20g
- Fiber: 0g
- Protein: 2g
- Cholesterol: 20mg
Keywords: Hocus Pocus, Halloween cookies, spooky cookies, festive treats