
Ghost-Shaped Sugar Cookies
Introduction to Ghost-Shaped Sugar Cookies
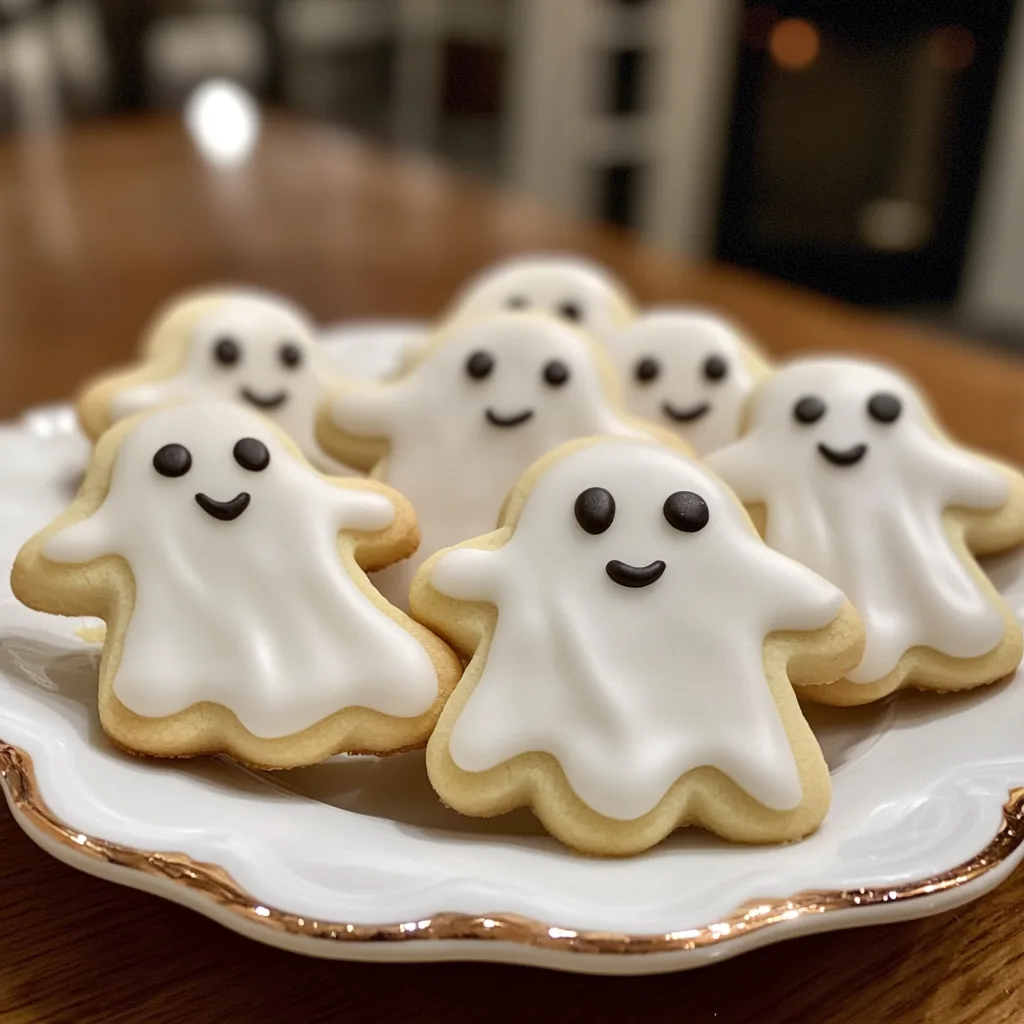
As the leaves turn and the air gets crisp, I can’t help but get excited about Halloween. One of my favorite traditions is baking ghost-shaped sugar cookies. These delightful treats are not just delicious; they’re a fun way to bring the family together. Whether you’re a busy mom juggling work and kids or a professional looking to impress at a gathering, this recipe is your perfect solution. With just a few simple ingredients, you can create spooky cookies that will haunt your taste buds and delight your loved ones. Let’s dive into this sweet adventure!
Why You’ll Love This Ghost-Shaped Sugar Cookies
These ghost-shaped sugar cookies are a breeze to make, even on your busiest days. With just a handful of ingredients and minimal prep time, you can whip up a batch in no time. Plus, their soft, buttery texture and sweet flavor are sure to please everyone, from picky eaters to dessert lovers. They’re perfect for Halloween parties, school events, or simply enjoying with a warm cup of tea. Trust me, they’ll vanish faster than you can say “Boo!”
Ingredients for Ghost-Shaped Sugar Cookies
To create these delightful ghost-shaped sugar cookies, you’ll need a few essential ingredients that you might already have in your pantry. Here’s what you’ll need:
- All-purpose flour: This is the backbone of your cookies, providing structure and a soft texture.
- Baking soda: This helps the cookies rise and gives them a light, fluffy feel.
- Baking powder: A little extra lift to ensure your cookies don’t turn out flat.
- Unsalted butter: Softened butter adds richness and flavor. Make sure it’s at room temperature for easy mixing.
- White sugar: This sweetens the cookies and contributes to their lovely golden color.
- Egg: Acts as a binding agent, helping to hold everything together while adding moisture.
- Vanilla extract: A must-have for that warm, comforting flavor that makes cookies irresistible.
- Salt: Just a pinch enhances the sweetness and balances the flavors.
- Almond extract: Optional, but it adds a delightful nutty flavor that pairs beautifully with vanilla.
- Royal icing: For decorating your ghostly creations, this icing hardens beautifully and can be tinted for extra fun.
For those looking to switch things up, consider using whole wheat flour for a nuttier flavor or coconut sugar for a hint of caramel sweetness. You can find the exact measurements for these ingredients at the bottom of the article, ready for printing!
How to Make Ghost-Shaped Sugar Cookies
Now that you have your ingredients ready, let’s get baking! Making ghost-shaped sugar cookies is a fun and straightforward process. Follow these steps, and you’ll have a batch of spooky treats in no time!
Step 1: Preheat the Oven
First things first, preheat your oven to 375°F (190°C). Preheating is crucial because it ensures your cookies bake evenly. If the oven isn’t hot enough, your cookies might spread too much or not rise properly. Trust me, a well-preheated oven is the secret to cookie perfection!
Step 2: Mix Dry Ingredients
In a medium bowl, combine your all-purpose flour, baking soda, and baking powder. Whisk them together until they’re well blended. This step is important because it evenly distributes the leavening agents, ensuring your cookies rise beautifully. No one wants flat cookies on Halloween!
Step 3: Cream Butter and Sugar
In a separate large bowl, cream together the softened unsalted butter and white sugar until the mixture is smooth and fluffy. This process usually takes about 2-3 minutes. Creaming incorporates air into the butter, giving your cookies that light, tender texture we all love. It’s like giving your cookies a little spa treatment!
Step 4: Add Wet Ingredients
Next, beat in the egg, vanilla extract, and almond extract. Mix until everything is well combined. The egg acts as a binder, while the extracts add that delicious flavor. You’ll start to see your cookie dough come together, and it will smell heavenly!
Step 5: Combine Mixtures
Gradually blend the dry ingredients into the creamed mixture. I like to do this in batches to avoid a flour explosion! Mix until just combined; overmixing can lead to tough cookies. You want a soft, slightly sticky dough that’s ready to be shaped into ghosts.
Step 6: Shape the Cookies
Now comes the fun part! Roll rounded teaspoonfuls of dough into balls and place them on ungreased cookie sheets. Flatten each ball gently with a glass dipped in sugar to create those adorable ghost shapes. Don’t worry about perfection; a little imperfection adds to their charm!
Step 7: Bake the Cookies
Pop your cookie sheets into the preheated oven and bake for 8 to 10 minutes. Keep an eye on them! You want them to be golden around the edges but still soft in the center. A little trick? If they’re slightly puffy and just starting to brown, they’re ready to come out!
Step 8: Cool and Decorate
Once baked, let the cookies cool on wire racks. This step is essential; it allows them to firm up. After they’ve cooled completely, it’s time to unleash your creativity with royal icing. Decorate your ghostly cookies with fun designs, and don’t forget to add some spooky eyes!
Tips for Success
- Chill the dough for 30 minutes before baking for a firmer texture.
- Use a glass dipped in sugar to flatten the dough for a sweet touch.
- Keep an eye on the cookies while baking; they can go from perfect to overdone quickly.
- Experiment with food coloring in your royal icing for festive designs.
- Store cookies in an airtight container to keep them fresh and soft.
Equipment Needed
- Baking sheets: If you don’t have non-stick sheets, line regular ones with parchment paper.
- Mixing bowls: A large bowl for creaming and a medium one for dry ingredients.
- Whisk: A fork can work in a pinch for mixing dry ingredients.
- Rolling pin: If you don’t have one, your hands will do just fine!
- Cookie cutters: Ghost-shaped cutters are ideal, but you can also use a knife for freehand shapes.
Variations
- For a chocolate twist, substitute 1/2 cup of all-purpose flour with cocoa powder for chocolate ghost cookies.
- Try adding a teaspoon of cinnamon or nutmeg to the dough for a warm, spiced flavor.
- Make them gluten-free by using a 1:1 gluten-free flour blend in place of all-purpose flour.
- For a vegan option, replace the egg with a flax egg (1 tablespoon ground flaxseed mixed with 2.5 tablespoons water) and use vegan butter.
- Experiment with different extracts, like peppermint or orange, for a unique flavor profile.
Serving Suggestions
- Pair these ghost-shaped sugar cookies with a warm cup of apple cider for a cozy treat.
- Serve them on a spooky-themed platter for Halloween parties to impress your guests.
- Consider adding a side of whipped cream or vanilla ice cream for an extra indulgent dessert.
- For a fun twist, package them in clear bags tied with orange ribbons as party favors.
FAQs about Ghost-Shaped Sugar Cookies
As you embark on your ghostly baking adventure, you might have a few questions. Here are some common queries I’ve encountered about these delightful ghost-shaped sugar cookies:
Can I make the dough ahead of time?
Absolutely! You can prepare the dough and refrigerate it for up to 3 days. Just make sure to wrap it tightly in plastic wrap. This not only saves time but also enhances the flavors!
How do I store my ghost-shaped sugar cookies?
To keep your cookies fresh, store them in an airtight container at room temperature. They’ll stay soft and delicious for about a week. If you want to keep them longer, consider freezing them!
Can I use different shapes for these cookies?
Of course! While ghost shapes are perfect for Halloween, feel free to use any cookie cutter you have on hand. Stars, pumpkins, or even simple circles work just as well!
What can I use instead of royal icing for decoration?
If royal icing isn’t your thing, you can use store-bought frosting or melted chocolate. Just remember, these alternatives may not harden like royal icing, but they’ll still taste amazing!
Are these cookies suitable for a gluten-free diet?
Yes! You can easily make these ghost-shaped sugar cookies gluten-free by substituting all-purpose flour with a 1:1 gluten-free flour blend. They’ll still be just as delightful!
Final Thoughts
Baking ghost-shaped sugar cookies is more than just a recipe; it’s a delightful experience that brings joy to your kitchen. The aroma of freshly baked cookies fills the air, creating a warm atmosphere that invites family and friends to gather. As you decorate each ghost with royal icing, you’re not just making treats; you’re crafting memories. These cookies are perfect for sharing, whether at a Halloween party or a cozy night in. So, roll up your sleeves, embrace the fun, and let these spooky delights haunt your taste buds and your heart this Halloween season!
PrintGhost-Shaped Sugar Cookies that Haunt Your Taste Buds!
Delicious and spooky ghost-shaped sugar cookies perfect for Halloween celebrations.
- Prep Time: 20 minutes
- Cook Time: 10 minutes
- Total Time: 30 minutes
- Yield: 24 cookies 1x
- Category: Dessert
- Method: Baking
- Cuisine: American
- Diet: Vegetarian
Ingredients
- 2 3/4 cups all-purpose flour
- 1 teaspoon baking soda
- 1/2 teaspoon baking powder
- 1 cup unsalted butter, softened
- 1 1/2 cups white sugar
- 1 egg
- 1 teaspoon vanilla extract
- 3/4 teaspoon salt
- 1/2 teaspoon almond extract
- Royal icing for decoration
Instructions
- Preheat your oven to 375°F (190°C).
- In a bowl, mix together flour, baking soda, and baking powder.
- In a separate bowl, cream together the butter and sugar until smooth.
- Beat in the egg, vanilla extract, and almond extract.
- Gradually blend the dry ingredients into the creamed mixture.
- Roll rounded teaspoonfuls of dough into balls, and place onto ungreased cookie sheets.
- Flatten each ball with a glass, dipped in sugar, to form ghost shapes.
- Bake 8 to 10 minutes in the preheated oven, or until golden.
- Let cool on wire racks before decorating with royal icing.
Notes
- For a more intense flavor, let the dough chill in the refrigerator for at least 30 minutes before baking.
- Use food coloring to tint the royal icing for more colorful decorations.
- Store cookies in an airtight container to maintain freshness.
Nutrition
- Serving Size: 1 cookie
- Calories: 150
- Sugar: 10g
- Sodium: 50mg
- Fat: 7g
- Saturated Fat: 4g
- Unsaturated Fat: 2g
- Trans Fat: 0g
- Carbohydrates: 20g
- Fiber: 0g
- Protein: 1g
- Cholesterol: 30mg
Keywords: Ghost-Shaped Sugar Cookies, Halloween Cookies, Sugar Cookies, Spooky Treats