
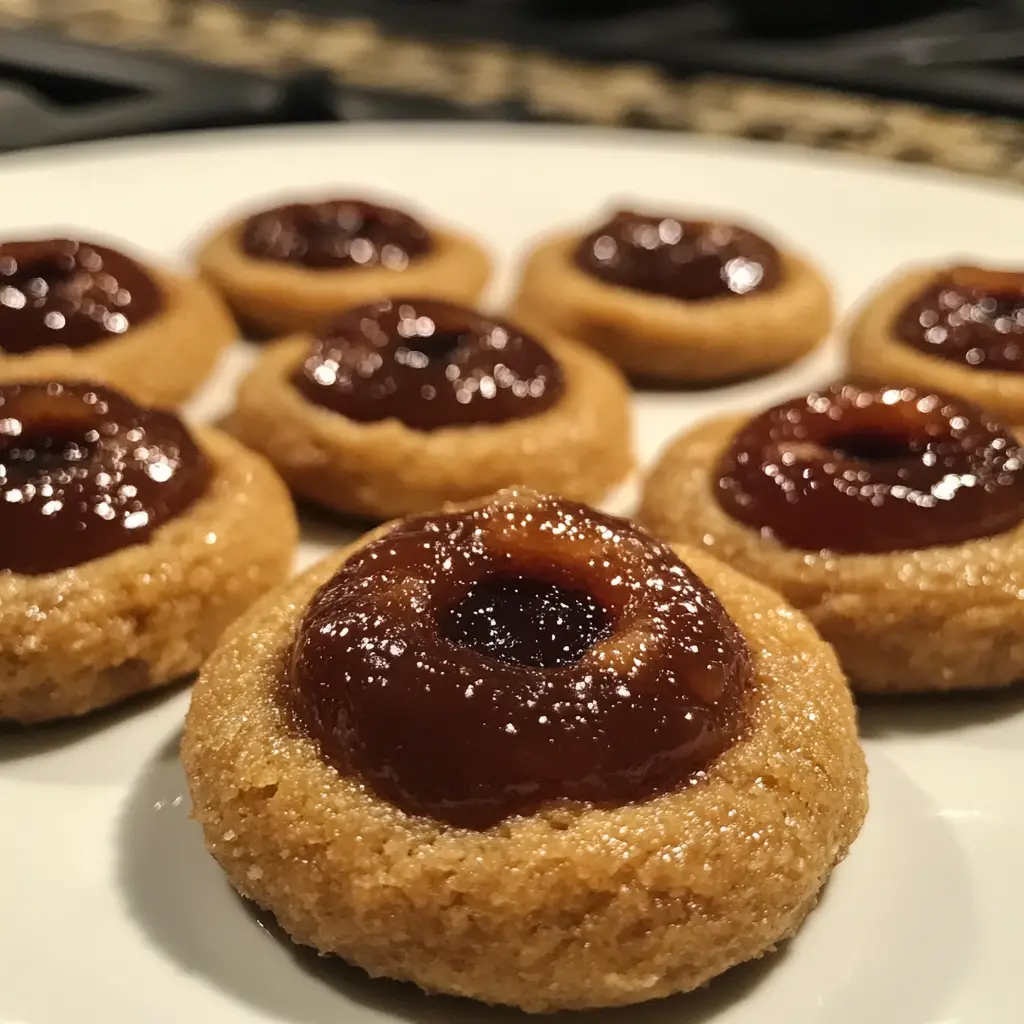
Apple Butter Thumbprint Cookies
Introduction to Apple Butter Thumbprint Cookies
As a busy mom, I know how precious time can be, especially when it comes to baking. That’s why I adore these Apple Butter Thumbprint Cookies! They’re not just a treat; they’re a delightful way to bring warmth and joy to any gathering. Imagine the rich, comforting flavor of apple butter nestled in a buttery cookie base, melting in your mouth. Whether you’re looking for a quick solution for a busy day or a dish to impress your loved ones, these cookies are the perfect answer. Let’s dive into this delicious adventure together!
Why You’ll Love This Apple Butter Thumbprint Cookies
These Apple Butter Thumbprint Cookies are a game-changer for busy lives. They come together in just 30 minutes, making them perfect for last-minute gatherings or cozy family nights. The buttery texture paired with the sweet, spiced apple butter creates a flavor explosion that’s hard to resist. Plus, they’re a hit with both kids and adults, ensuring smiles all around. Trust me, once you try them, you’ll be hooked!
Ingredients for Apple Butter Thumbprint Cookies
Gathering the right ingredients is the first step to creating these delightful Apple Butter Thumbprint Cookies. Here’s what you’ll need:
- Unsalted Butter: This is the star of the show! Softened butter gives the cookies a rich, creamy texture.
- Granulated Sugar: Sweetness is key! It helps create that lovely golden color and adds to the cookie’s tenderness.
- Large Egg: Eggs bind the ingredients together and add moisture, making the cookies soft and chewy.
- Vanilla Extract: A splash of vanilla enhances the flavor, giving the cookies a warm, inviting aroma.
- All-Purpose Flour: This is the backbone of the cookie dough, providing structure and stability.
- Baking Powder: A little leavening agent that helps the cookies rise, making them light and fluffy.
- Salt: Just a pinch! It balances the sweetness and enhances all the flavors.
- Apple Butter: The star ingredient! It adds a rich, spiced flavor that makes these cookies truly special.
For those looking to mix things up, consider adding spices like cinnamon or nutmeg to the dough for an extra kick. You can also substitute the apple butter with other fruit preserves if you’re feeling adventurous!
Exact measurements for these ingredients can be found at the bottom of the article, ready for you to print and take to the kitchen!
How to Make Apple Butter Thumbprint Cookies
Now that we have our ingredients ready, let’s get baking! Follow these simple steps to create your delicious Apple Butter Thumbprint Cookies. I promise, it’s easier than you think!
Step 1: Preheat the Oven
First things first, preheat your oven to 350°F (175°C). Preheating is crucial because it ensures that your cookies bake evenly. If you skip this step, you might end up with cookies that are too soft or burnt on the edges. Trust me, a little patience goes a long way!
Step 2: Cream the Butter and Sugar
In a large bowl, cream together the softened butter and granulated sugar until the mixture is light and fluffy. This step is vital because it incorporates air into the dough, giving your cookies that delightful texture. Aim for a pale yellow color, which usually takes about 2-3 minutes of mixing.
Step 3: Add Egg and Vanilla
Next, add in the large egg and vanilla extract. Mix until everything is well combined. The egg adds moisture and helps bind the ingredients, while the vanilla brings a warm, inviting flavor that makes your cookies irresistible. It’s like a hug in a cookie!
Step 4: Combine Dry Ingredients
In a separate bowl, whisk together the all-purpose flour, baking powder, and salt. Whisking them separately is important because it ensures that the baking powder and salt are evenly distributed throughout the flour. This step helps your cookies rise perfectly!
Step 5: Mix Wet and Dry Ingredients
Now, gradually add the dry ingredients to the wet mixture. Stir gently until just combined. Be careful not to overmix! Overmixing can lead to tough cookies, and we want them to be soft and tender. A few flour streaks are okay!
Step 6: Shape the Cookies
Once your dough is ready, roll it into small balls, about one inch in diameter. Place them on a baking sheet lined with parchment paper, spacing them about two inches apart. This spacing allows the cookies to spread without sticking together. Plus, it gives them room to breathe!
Step 7: Create Indentations
Using your thumb, gently press down in the center of each cookie to create an indentation. This is where the apple butter will go! Don’t press too hard; you want a nice well without breaking the cookie. Think of it as making a little nest for the delicious filling!
Step 8: Fill with Apple Butter
Now comes the fun part! Fill each indentation with a spoonful of apple butter. Aim for about a teaspoon in each cookie. If you overfill, the apple butter might spill over while baking, and we don’t want that! Just enough to create a sweet surprise in every bite.
Step 9: Bake the Cookies
Pop the baking sheet into your preheated oven and bake for 12-15 minutes. Keep an eye on them! You’ll know they’re done when the edges are lightly golden. If you want to be extra sure, you can gently touch the edge; it should feel firm.
Step 10: Cool and Enjoy
Once baked, allow the cookies to cool on the baking sheet for a few minutes. This helps them set before transferring them to a wire rack to cool completely. Store your cookies in an airtight container, and they’ll stay fresh for up to a week. But let’s be honest, they probably won’t last that long!
Tips for Success
- Make sure your butter is softened to room temperature for easy creaming.
- Use a cookie scoop for uniform cookie sizes, ensuring even baking.
- Chill the dough for 15 minutes if it feels too sticky to handle.
- Experiment with different flavors of apple butter for a unique twist.
- Don’t skip the cooling step; it helps the cookies firm up perfectly!
Equipment Needed
- Mixing Bowls: A set of various sizes is handy; you can use any large bowl you have.
- Electric Mixer: A hand mixer works great, but a whisk can do the job too!
- Baking Sheet: Use any flat baking tray; just line it with parchment paper.
- Cookie Scoop: A tablespoon works well for portioning the dough.
- Wire Rack: If you don’t have one, a plate will work for cooling the cookies.
Variations of Apple Butter Thumbprint Cookies
- Spiced Apple Butter: Use spiced apple butter for an extra kick of flavor. It adds warmth and depth to each bite.
- Nutty Twist: Incorporate chopped nuts like walnuts or pecans into the dough for added crunch and richness.
- Gluten-Free Option: Substitute all-purpose flour with a gluten-free blend to make these cookies suitable for gluten-sensitive friends.
- Chocolate Drizzle: After baking, drizzle melted chocolate over the cooled cookies for a decadent touch.
- Fruit Preserves: Swap out apple butter for other fruit preserves like raspberry or apricot for a different flavor profile.
Serving Suggestions
- Pair these cookies with a warm cup of chai or spiced apple cider for a cozy treat.
- Serve alongside a scoop of vanilla ice cream for a delightful dessert experience.
- For a festive touch, arrange them on a decorative platter with fresh apple slices.
- Dust with powdered sugar before serving for an elegant finish.
FAQs about Apple Butter Thumbprint Cookies
Can I use store-bought apple butter?
Absolutely! Store-bought apple butter works perfectly in this recipe. It saves time and still delivers that delicious flavor we love. Just make sure to choose a high-quality brand for the best taste!
How do I store leftover cookies?
To keep your Apple Butter Thumbprint Cookies fresh, store them in an airtight container at room temperature. They’ll stay delicious for up to a week. If you want to keep them longer, consider freezing them!
Can I make the dough ahead of time?
Yes! You can prepare the dough in advance and refrigerate it for up to 2 days. Just let it sit at room temperature for a few minutes before rolling into balls. This makes it super convenient for busy days!
What can I substitute for apple butter?
If you don’t have apple butter on hand, you can use other fruit preserves like peach or apricot. Each will give a unique twist to your cookies while still being delicious!
Can I add nuts to the cookies?
Definitely! Chopped nuts like walnuts or pecans can be mixed into the dough for added texture and flavor. Just be sure to adjust the amount of flour slightly if you add a lot!
Final Thoughts
Making Apple Butter Thumbprint Cookies is more than just baking; it’s about creating memories. The aroma wafting through your kitchen will transport you to cozy autumn days, even if it’s summer outside. Each bite is a delightful reminder of the simple joys in life. Whether you’re sharing them with family or enjoying a quiet moment with a cup of tea, these cookies bring warmth and happiness. So, roll up your sleeves, gather your loved ones, and embark on this delicious adventure. Trust me, the smiles you’ll see will be worth every minute spent in the kitchen!
PrintApple Butter Thumbprint Cookies: A Delightful Treat to Try!

Apple Butter Thumbprint Cookies are a delightful treat that combines the rich flavor of apple butter with a buttery cookie base, perfect for any occasion.
- Prep Time: 15 minutes
- Cook Time: 15 minutes
- Total Time: 30 minutes
- Yield: 24 cookies 1x
- Category: Dessert
- Method: Baking
- Cuisine: American
- Diet: Vegetarian
Ingredients
- 1 cup unsalted butter, softened
- 1 cup granulated sugar
- 1 large egg
- 2 teaspoons vanilla extract
- 2 cups all-purpose flour
- 1 teaspoon baking powder
- 1/2 teaspoon salt
- 1 cup apple butter
Instructions
- Preheat the oven to 350°F (175°C).
- In a large bowl, cream together the softened butter and sugar until light and fluffy.
- Add the egg and vanilla extract, mixing until well combined.
- In a separate bowl, whisk together the flour, baking powder, and salt.
- Gradually add the dry ingredients to the wet mixture, stirring until just combined.
- Roll the dough into small balls and place them on a baking sheet lined with parchment paper.
- Using your thumb, make an indentation in the center of each cookie.
- Fill each indentation with apple butter.
- Bake for 12-15 minutes or until the edges are lightly golden.
- Allow to cool on the baking sheet for a few minutes before transferring to a wire rack to cool completely.
Notes
- For a twist, try adding spices like cinnamon or nutmeg to the dough.
- Store cookies in an airtight container for up to a week.
- These cookies can be frozen for longer storage.
Nutrition
- Serving Size: 1 cookie
- Calories: 150
- Sugar: 8g
- Sodium: 50mg
- Fat: 7g
- Saturated Fat: 4g
- Unsaturated Fat: 2g
- Trans Fat: 0g
- Carbohydrates: 20g
- Fiber: 1g
- Protein: 2g
- Cholesterol: 30mg
Keywords: Apple Butter, Thumbprint Cookies, Dessert, Baking